Zion National Park: Zion Canyon Hikes & Tips
The first time I visited Zion National Park, along with Bryce Canyon and Grand Staircase-Escalante National Monument, was 10 years ago. I was still fairly new to the outdoors and it was my first time to the Utah desert. It was a mind blowing trip for me: the grandness, the vastness, the redness, the strangeness shocked me. I ooh’d and ah’d at every turn. To this day it's still one of my most memorable trips.
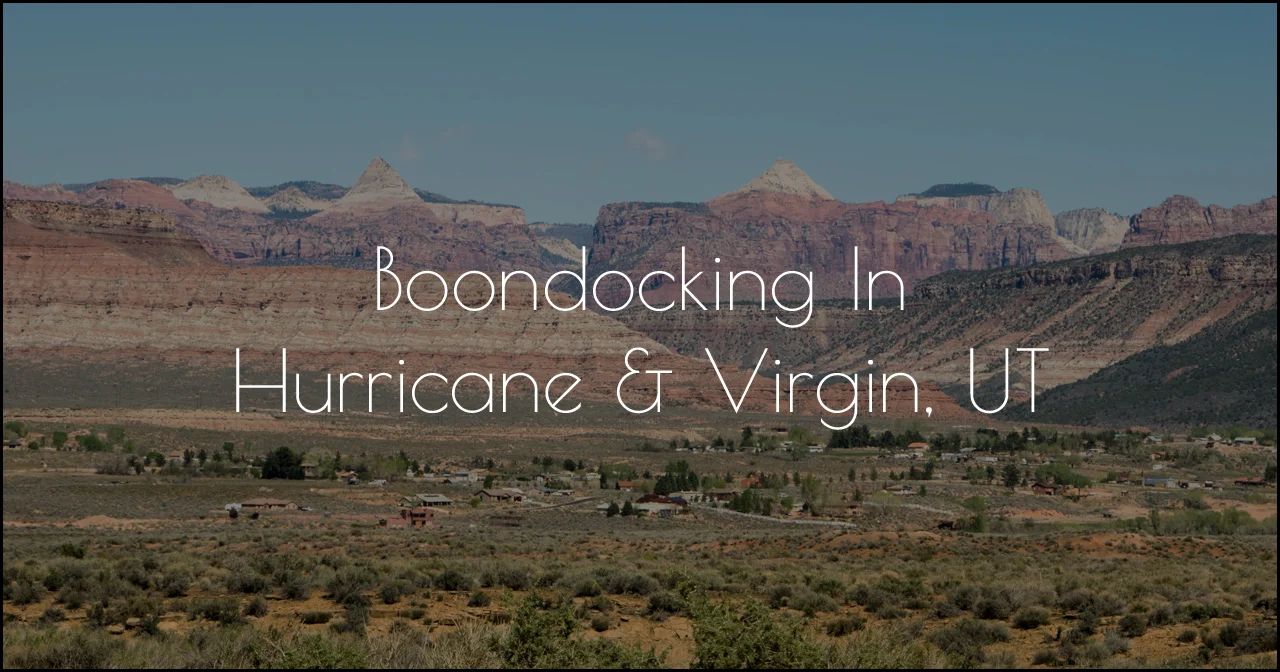
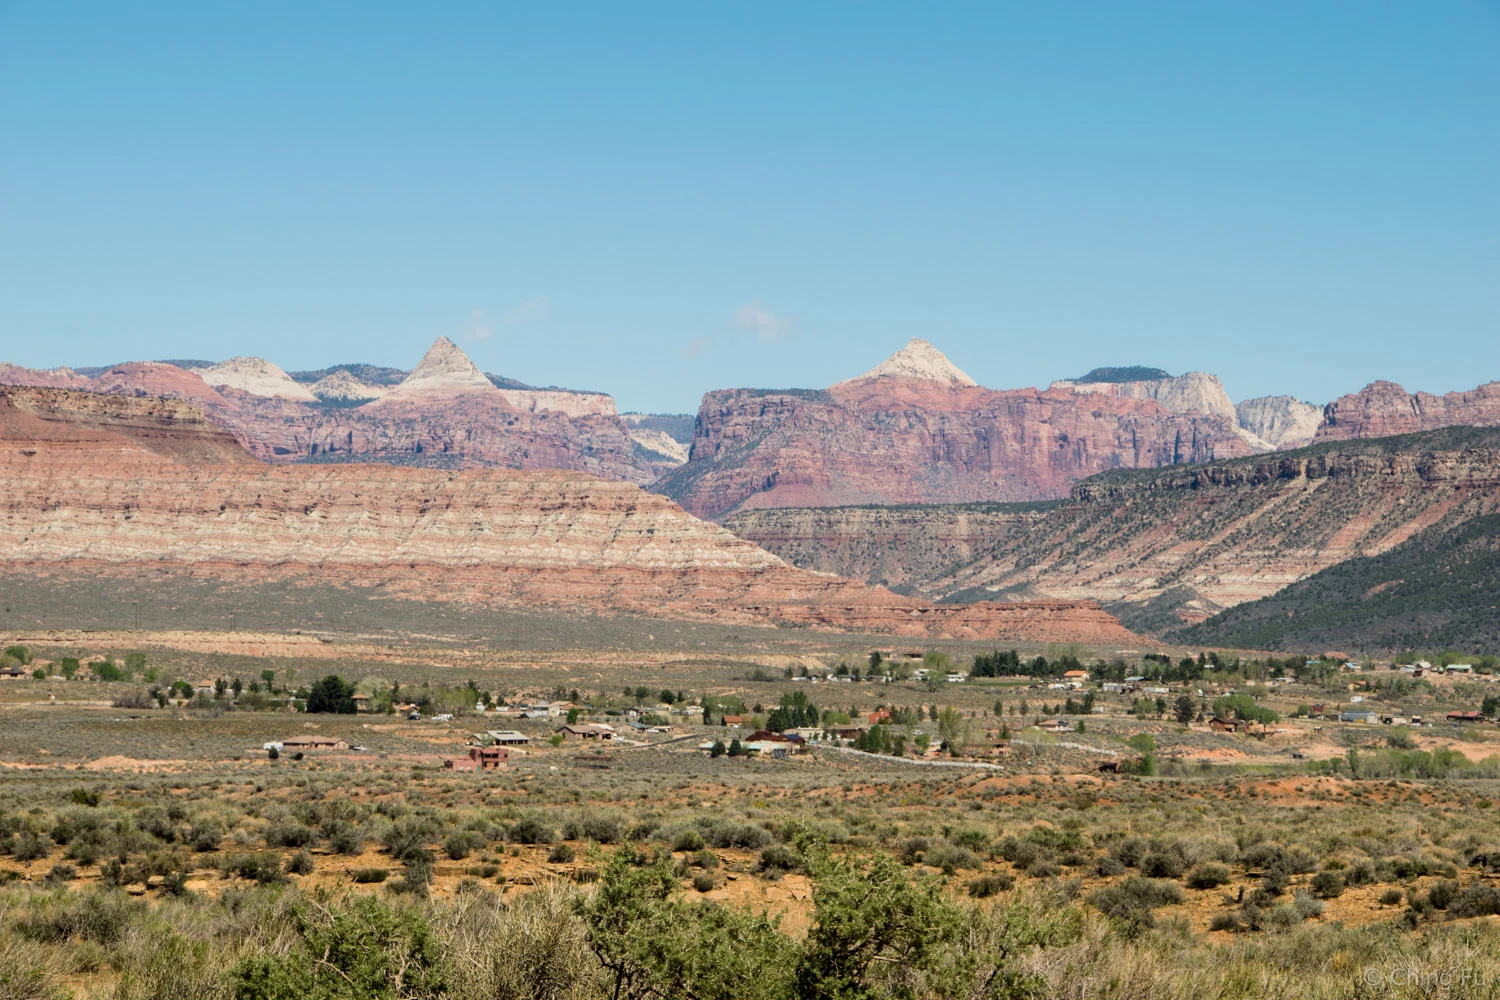
We didn’t realize until we arrived in Hurricane how close to Zion National Park (Zion Canyon part of the park) we were boondocked – 17 miles to be exact. From the two boondocking sites we stayed at we could see the Zion mountains in the horizon. The benefit of living this close to a national park is that we aren’t in a hurry to do everything in a few days’ time.
Unlike 10 years ago, today there is a bus shuttle offered in Zion Canyon (the main popular section of Zion National Park) and personal vehicles are not allowed inside the park beyond the visitor center from March - November (unless you’re staying at Zion Lodge or driving out the east entrance). This year, the bus shuttle started on Saturday, March 12. Sooner than I expected, but it turns out that March is a busy month (spring break and Easter). We wanted to get to Zion before the shuttle started because we knew it would add on extra time that we couldn’t spare because of Tybee. So we made two trips to Zion before March 12 and then three more over Easter weekend when Dolly and Bill, our friends from Asheville, came to visit, then one more after that. (The last time we met up with them was when they went to Yellowstone National Park for vacation. I see a potential tradition being born!)
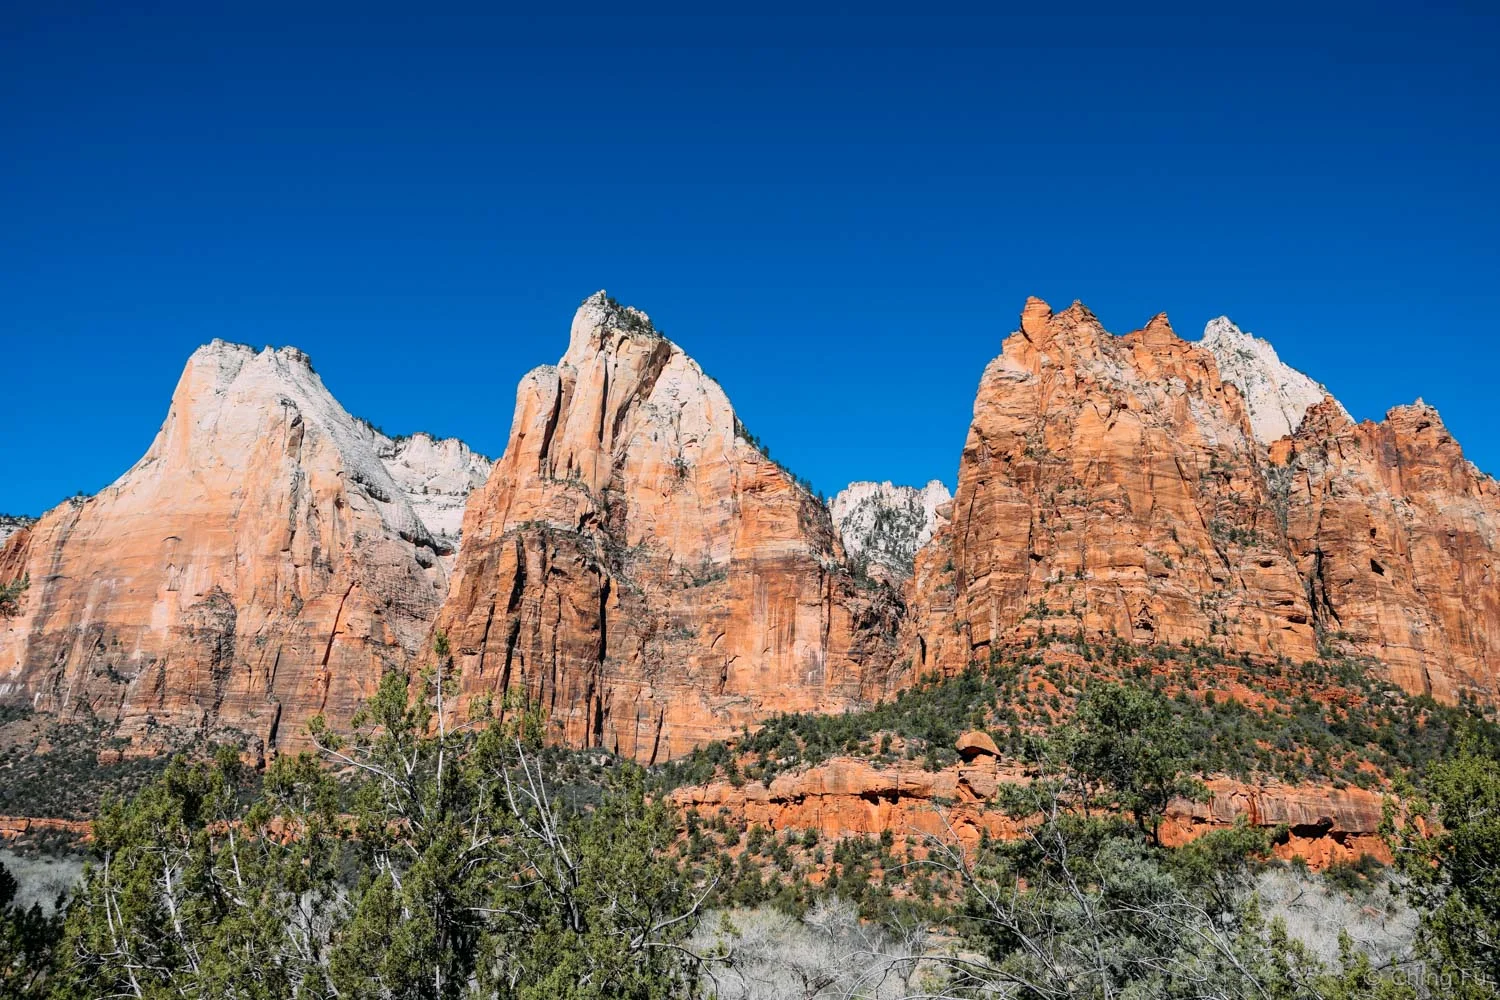
Court of Patriarchs
A super short and steep walk up a paved trail to an overlook where we took in views of the three rock patriarchs: Abraham, Isaac, and Jacob.
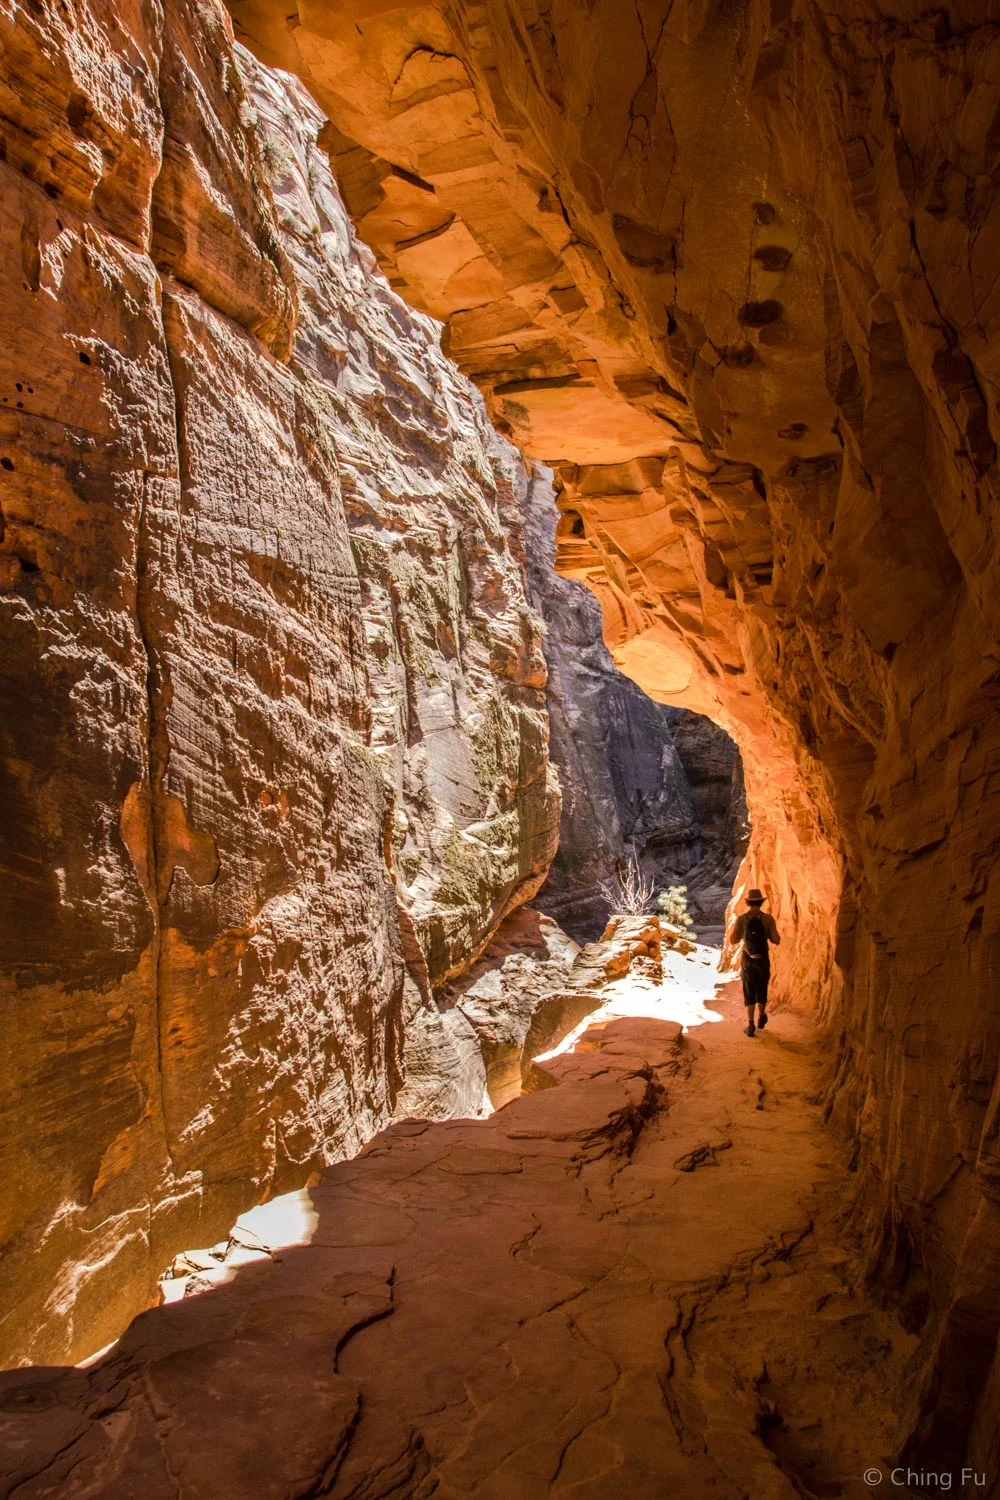
Weeping Rock Trail
Another short, but steep, hike leads to a rock alcove with dripping springs from above.

Riverside Walk
Pretty, but I find the Riverside Walk to just be a tease – I get to the end of it and the entrance of the Narrows and just want to keep going. While some people did continue walking through the river in regular hiking clothes and shoes in March, I don’t recommend it. We were told the water was 46 degrees when we hiked the Narrows.
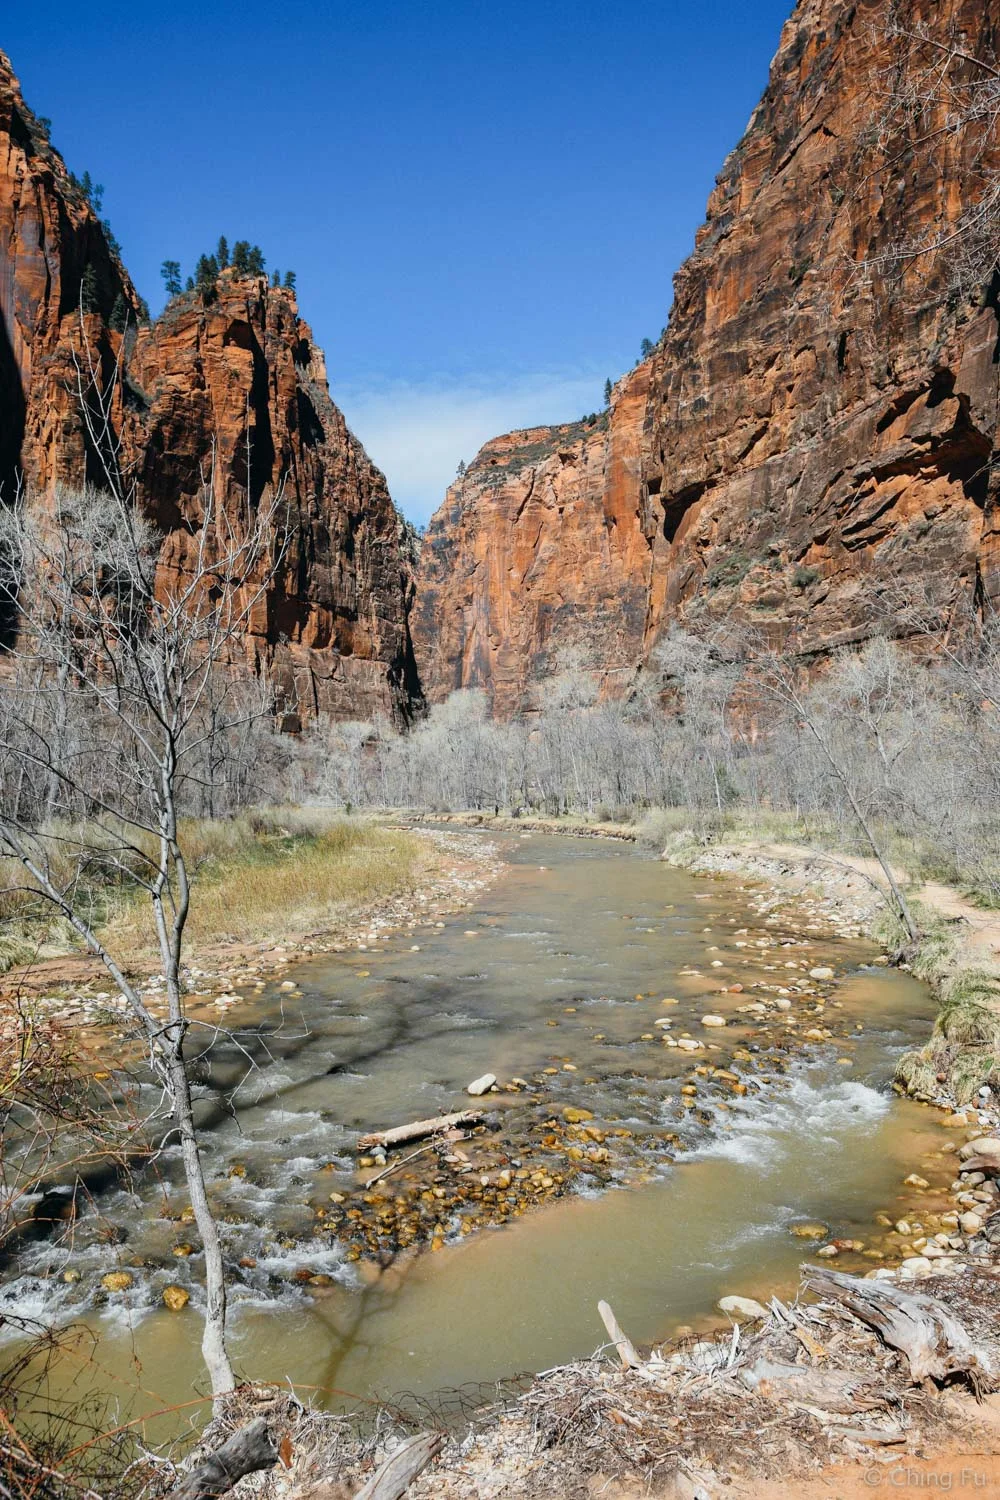
End of Riverside Walk and beginning of the Narrows.
Angels Landing
We got lucky and there weren’t a ton of people hiking up to Angels Landing the day we went (not like on Easter Monday when I went with Dolly and Bill). As cautious and sue-happy as American society is, I’m very surprised that the park service lets the general masses hike up the narrow ridge to the summit. But I’m glad because it’s a unique experience.
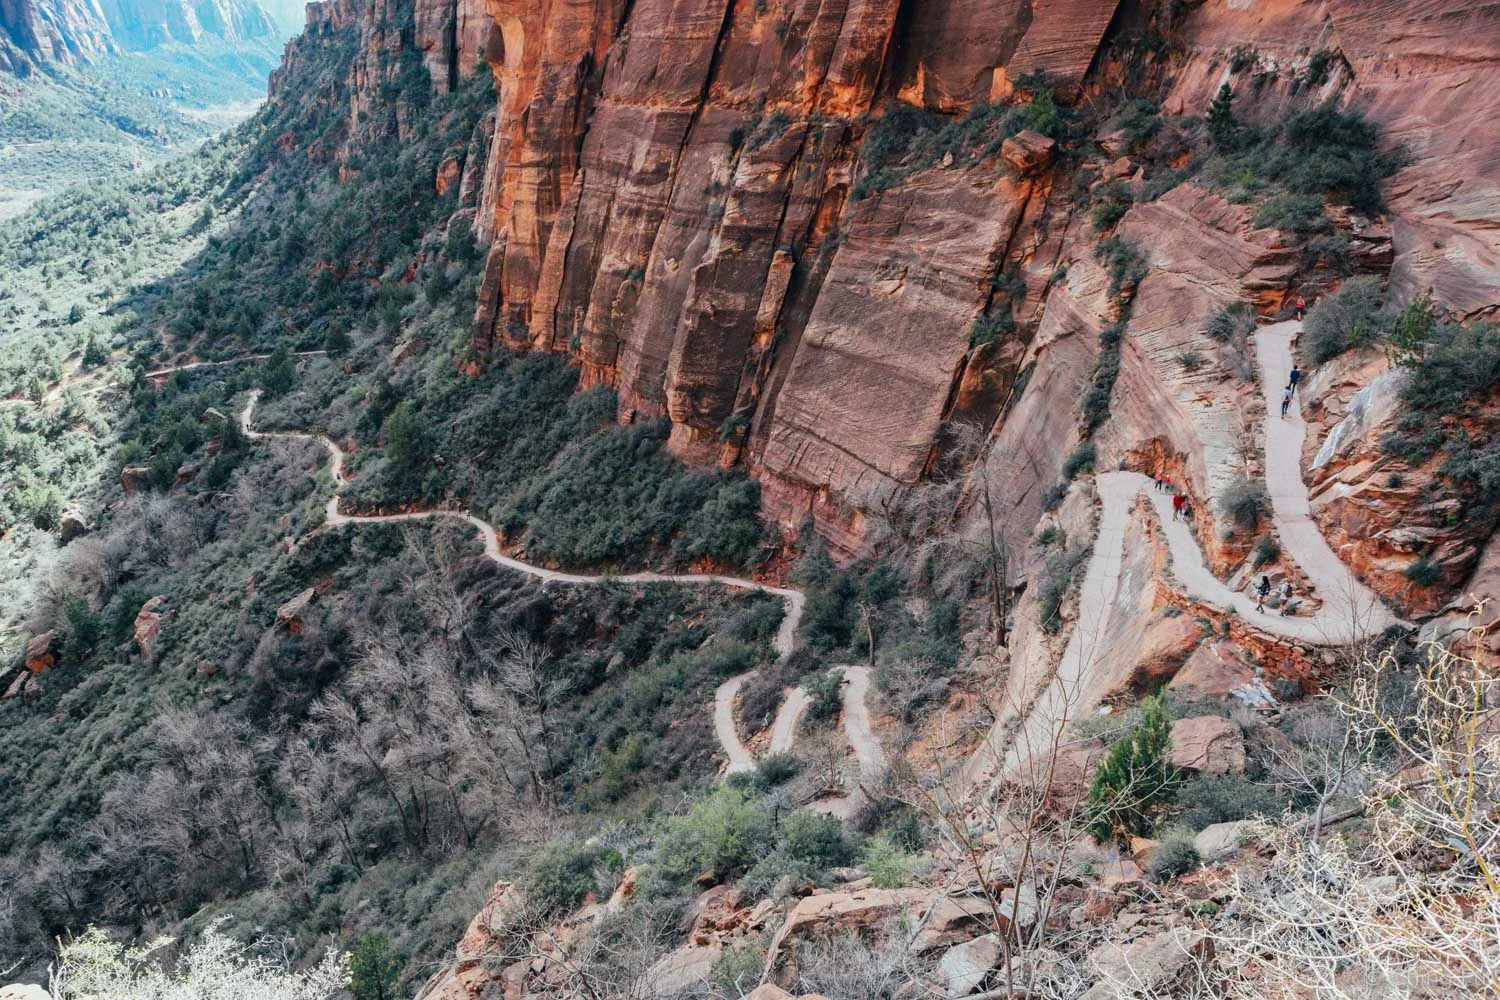
The first section of the hike up to Angels Landing.
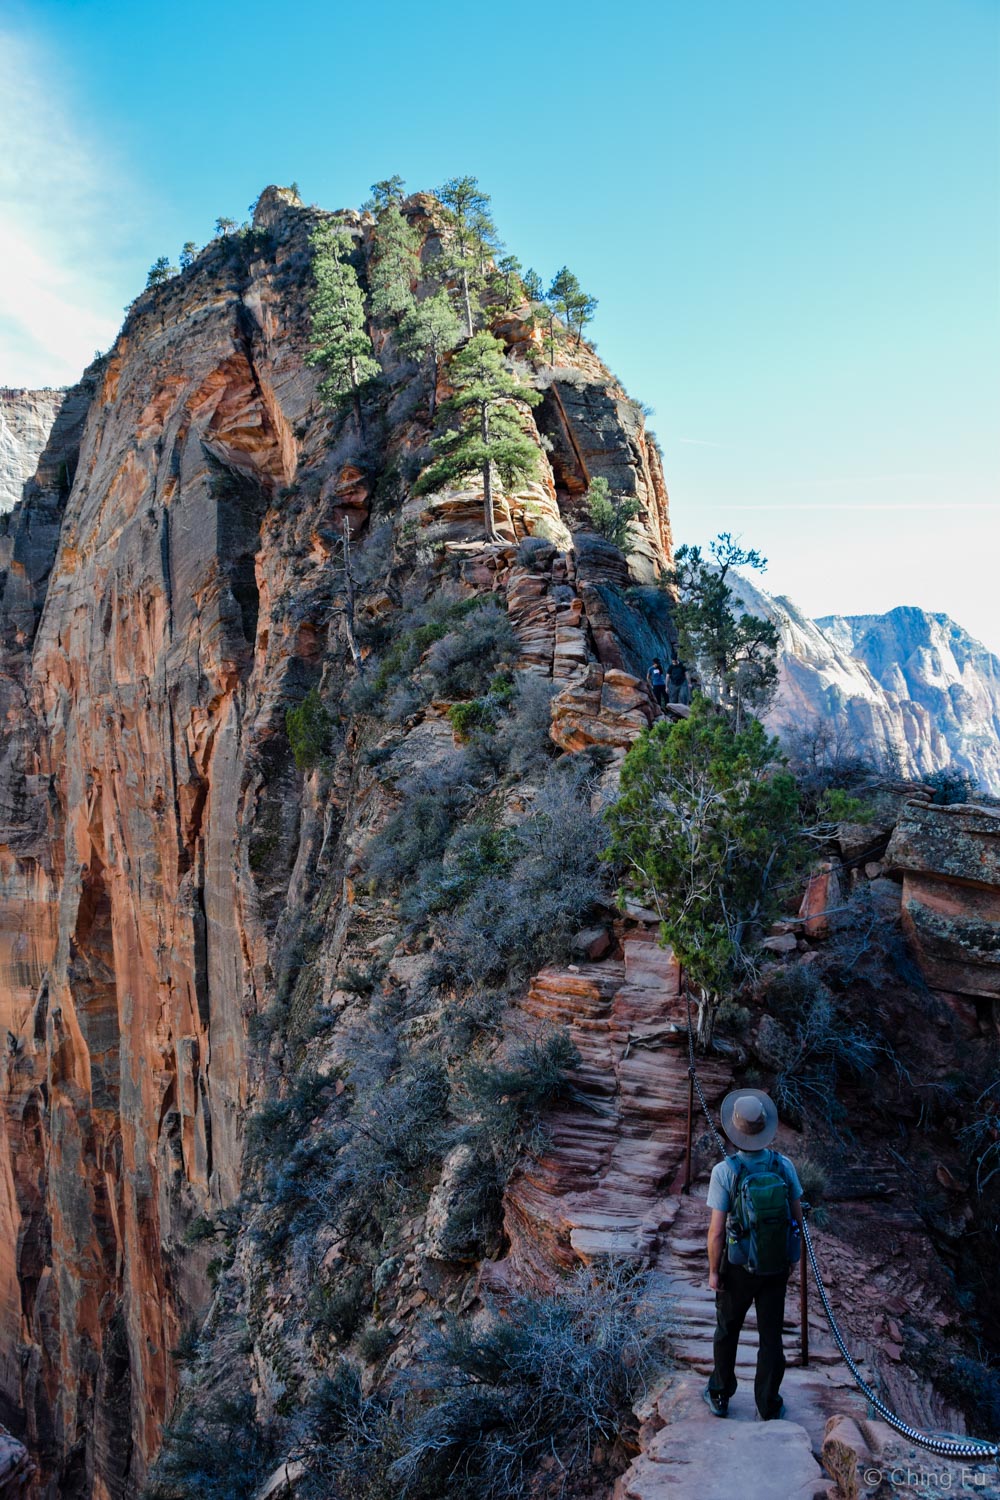
Hiking straight up the spine to the peak.
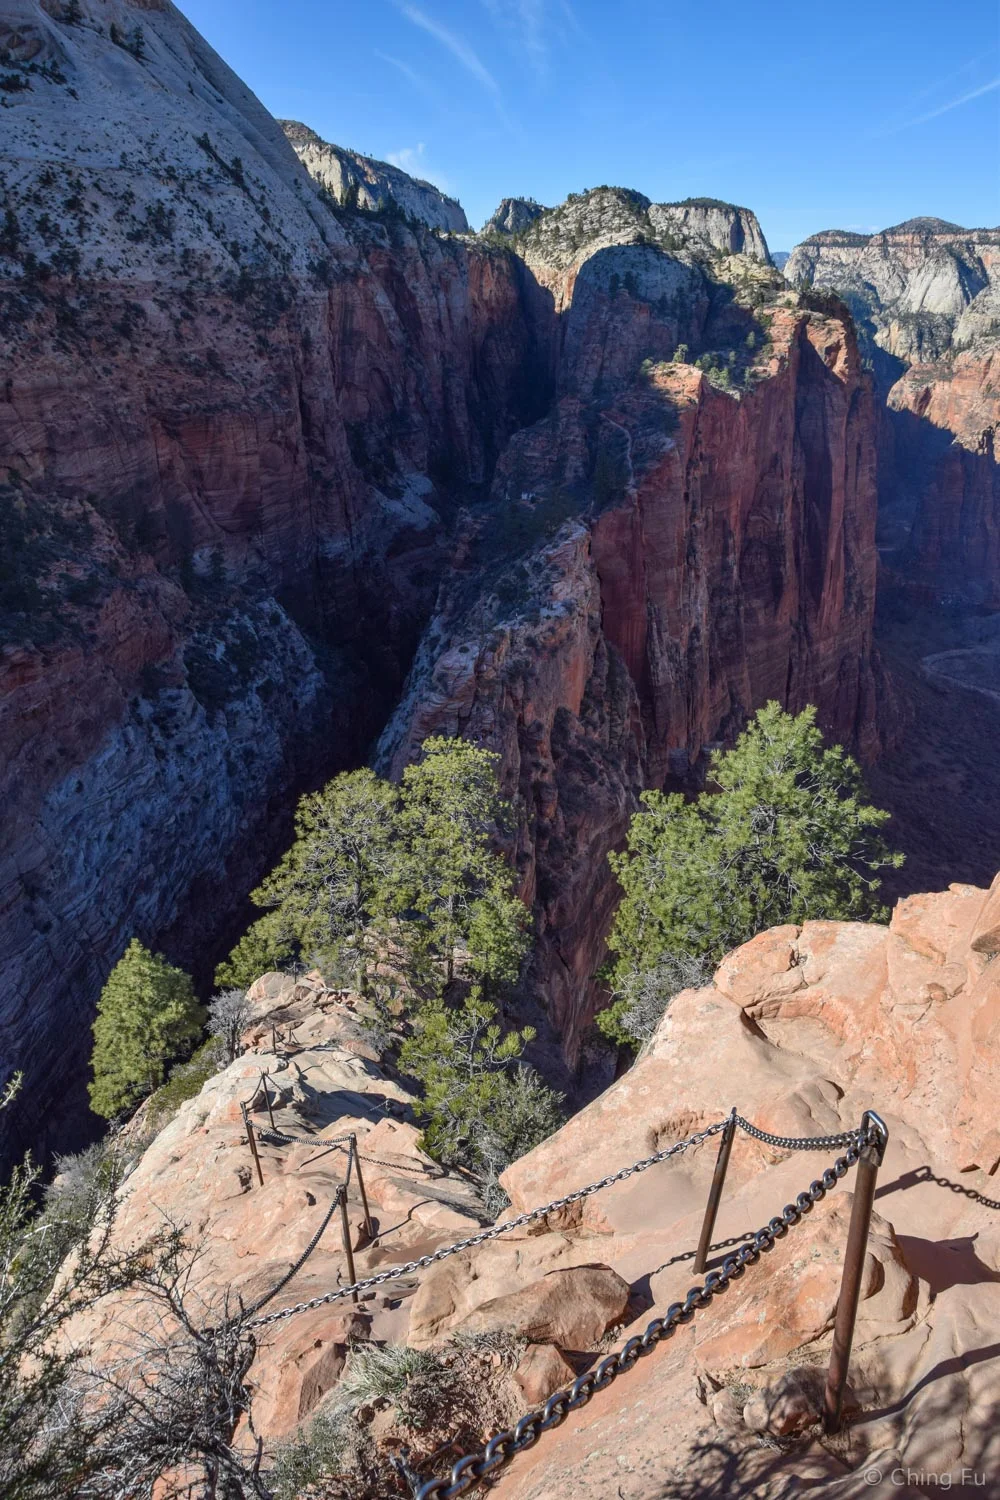
Looking all the way back into the shadows to see the narrow section we hiked from.
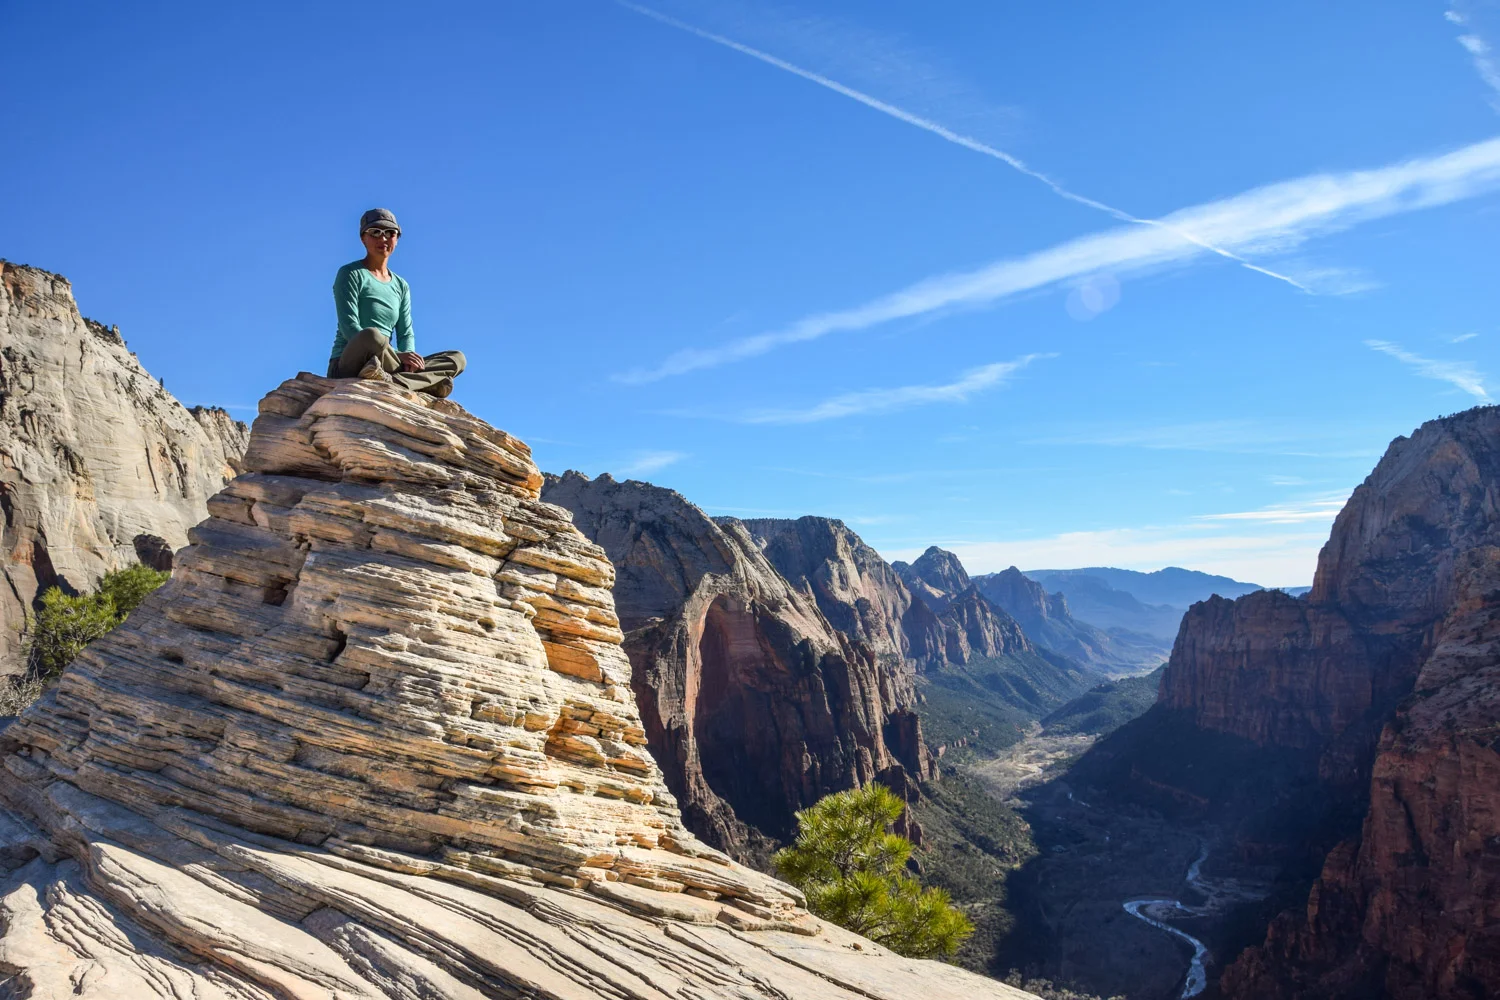
At the top with Zion Canyon in the background.
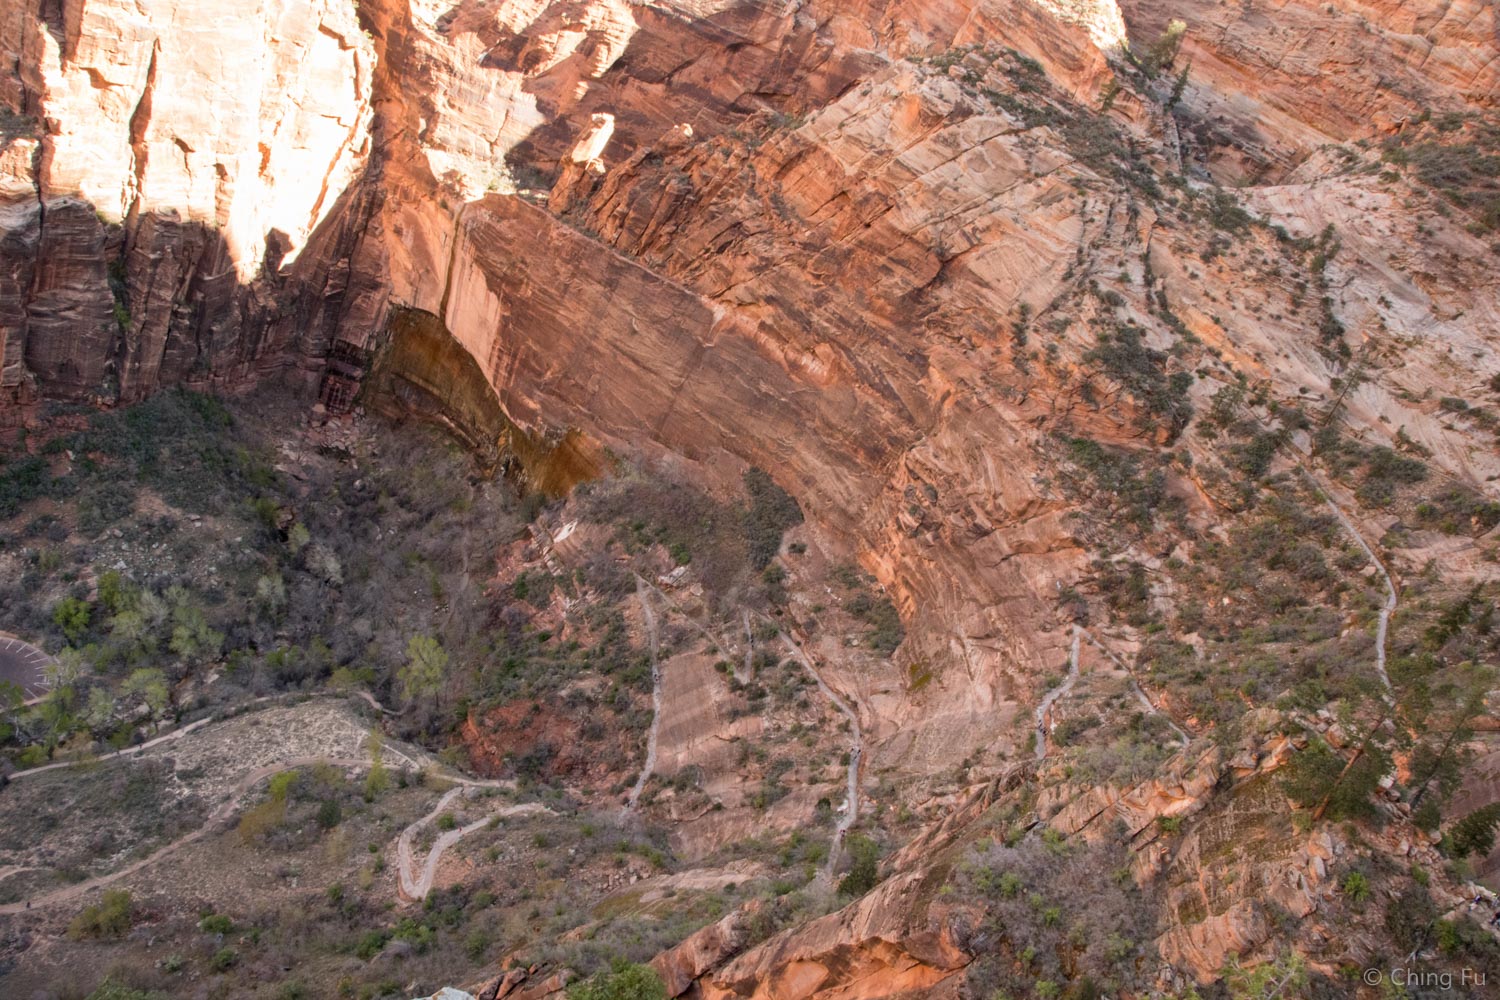
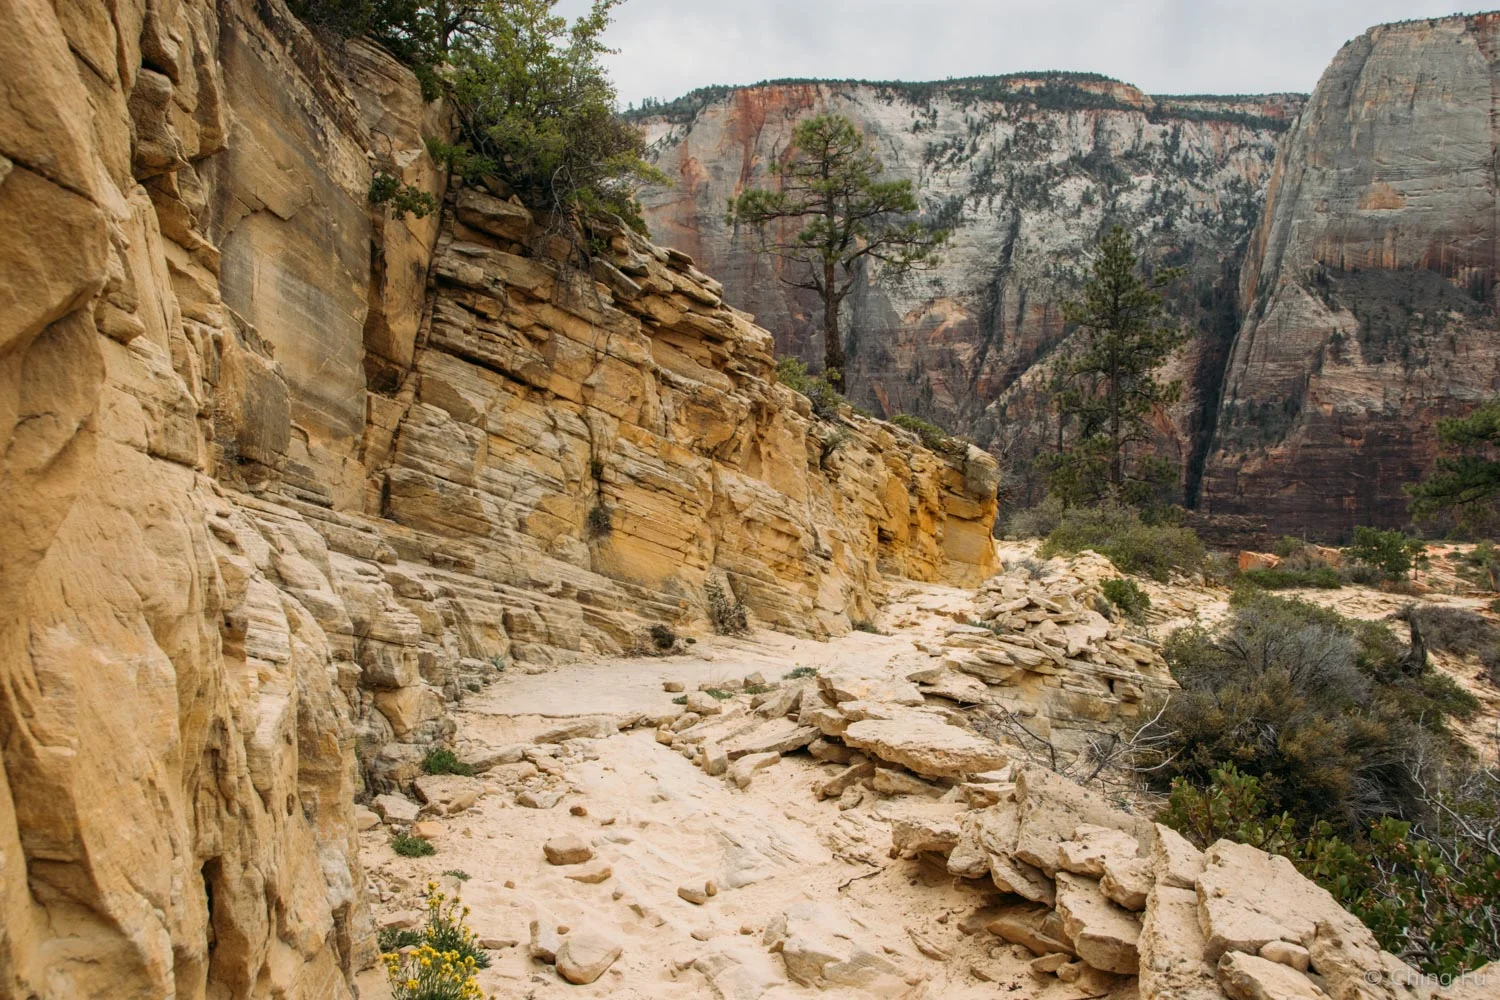
Observation Point
My favorite part of the hike up to Observation Point is going through Echo Canyon. This hike is also nice because we got to see additional mountains that we can’t from the road. Our timing worked out nicely because Echo Canyon was still in the shade when we went up it in the morning (around 10 AM) and by the time we came down through it (around noon) parts of it was in the sun.
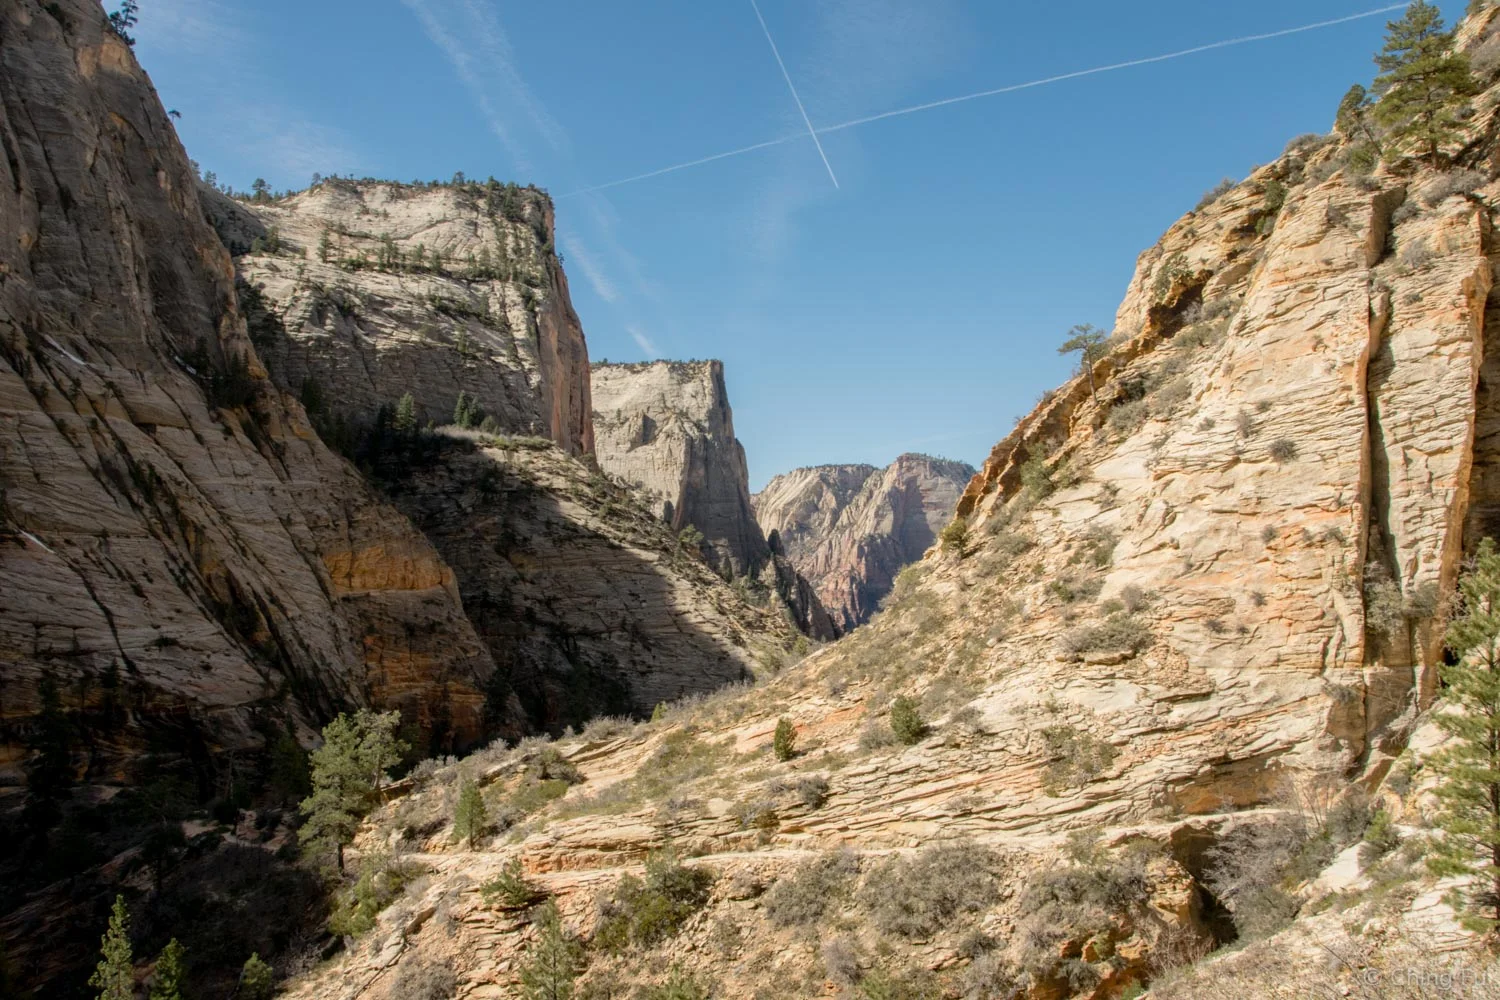
Hiking through Echo Canyon.
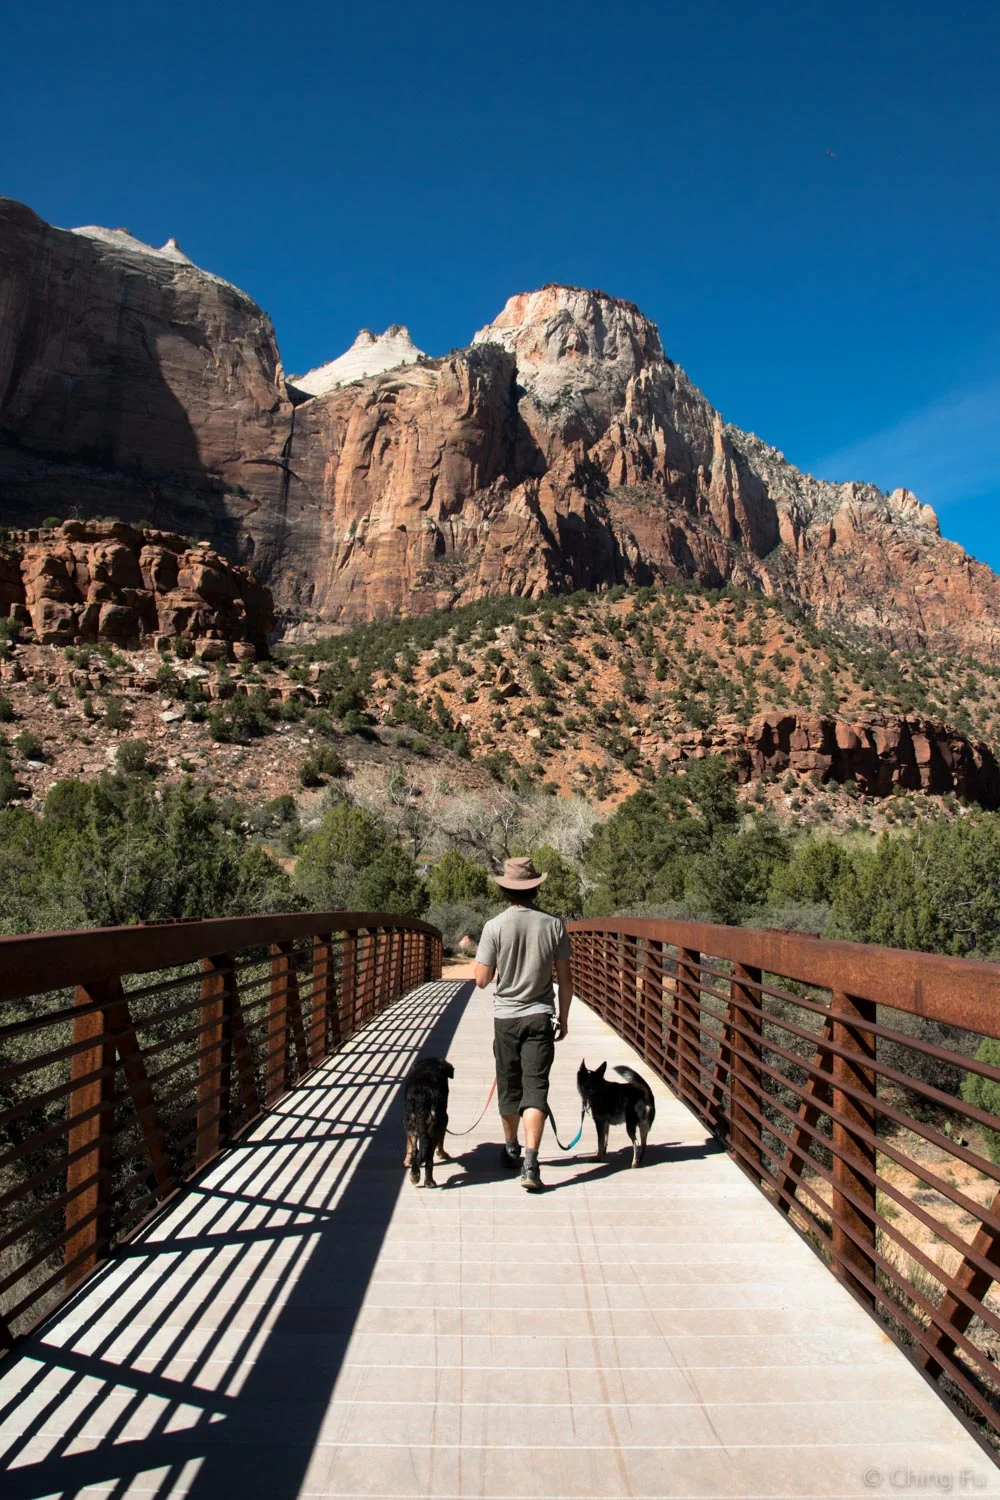
Pa’rus Trail
We hiked a short little section on the paved Pa’rus Trail, from Canyon Junction towards the main entrance, so the dogs could get out and stretch their legs. This is the only trail in the park that dogs are allowed on. Poop bags are even provided at the trail entrances. It’s a really pretty view from the river under the bridge part of the trail. On a hot day it would also be great to cool off in the Virgin River.
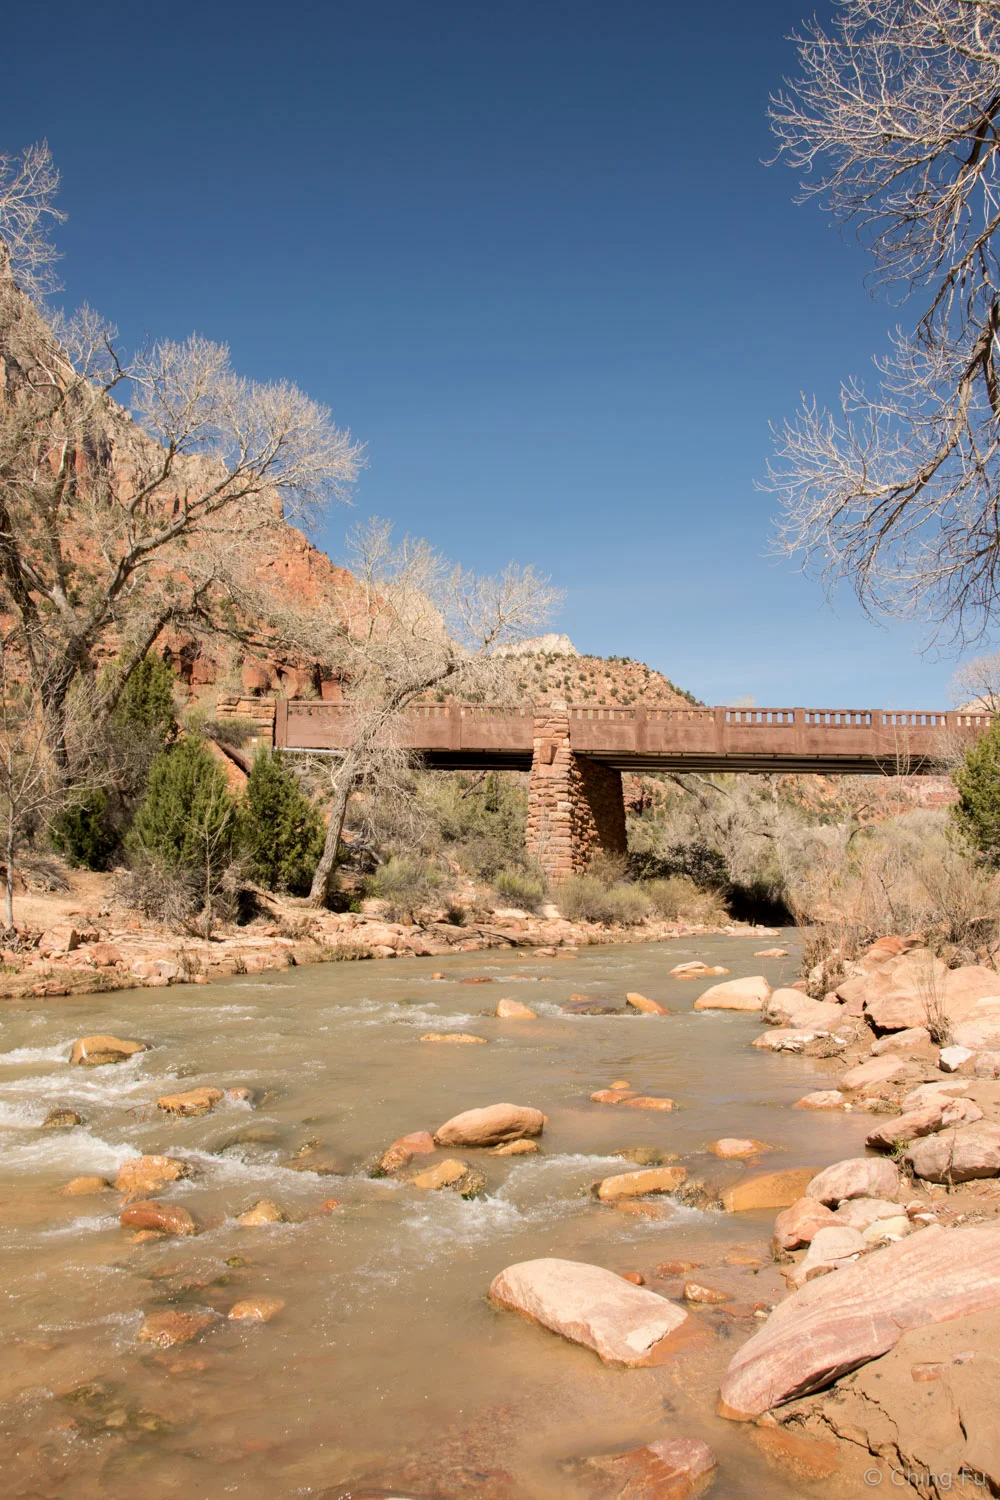
View from Pa'rus Trail of the Virgin River.
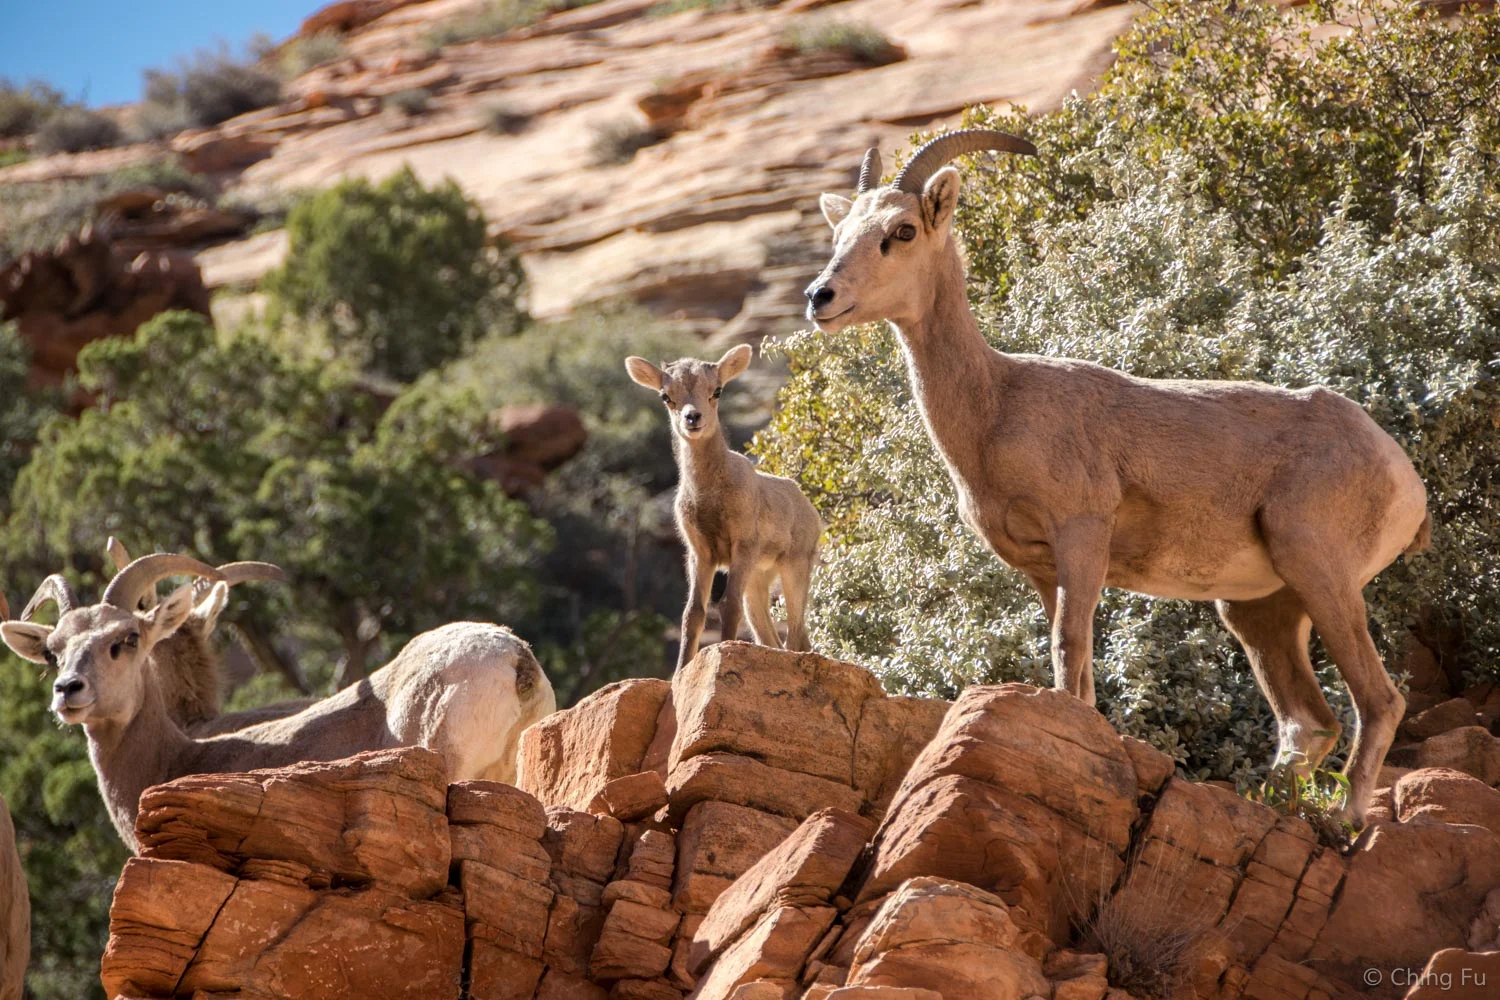
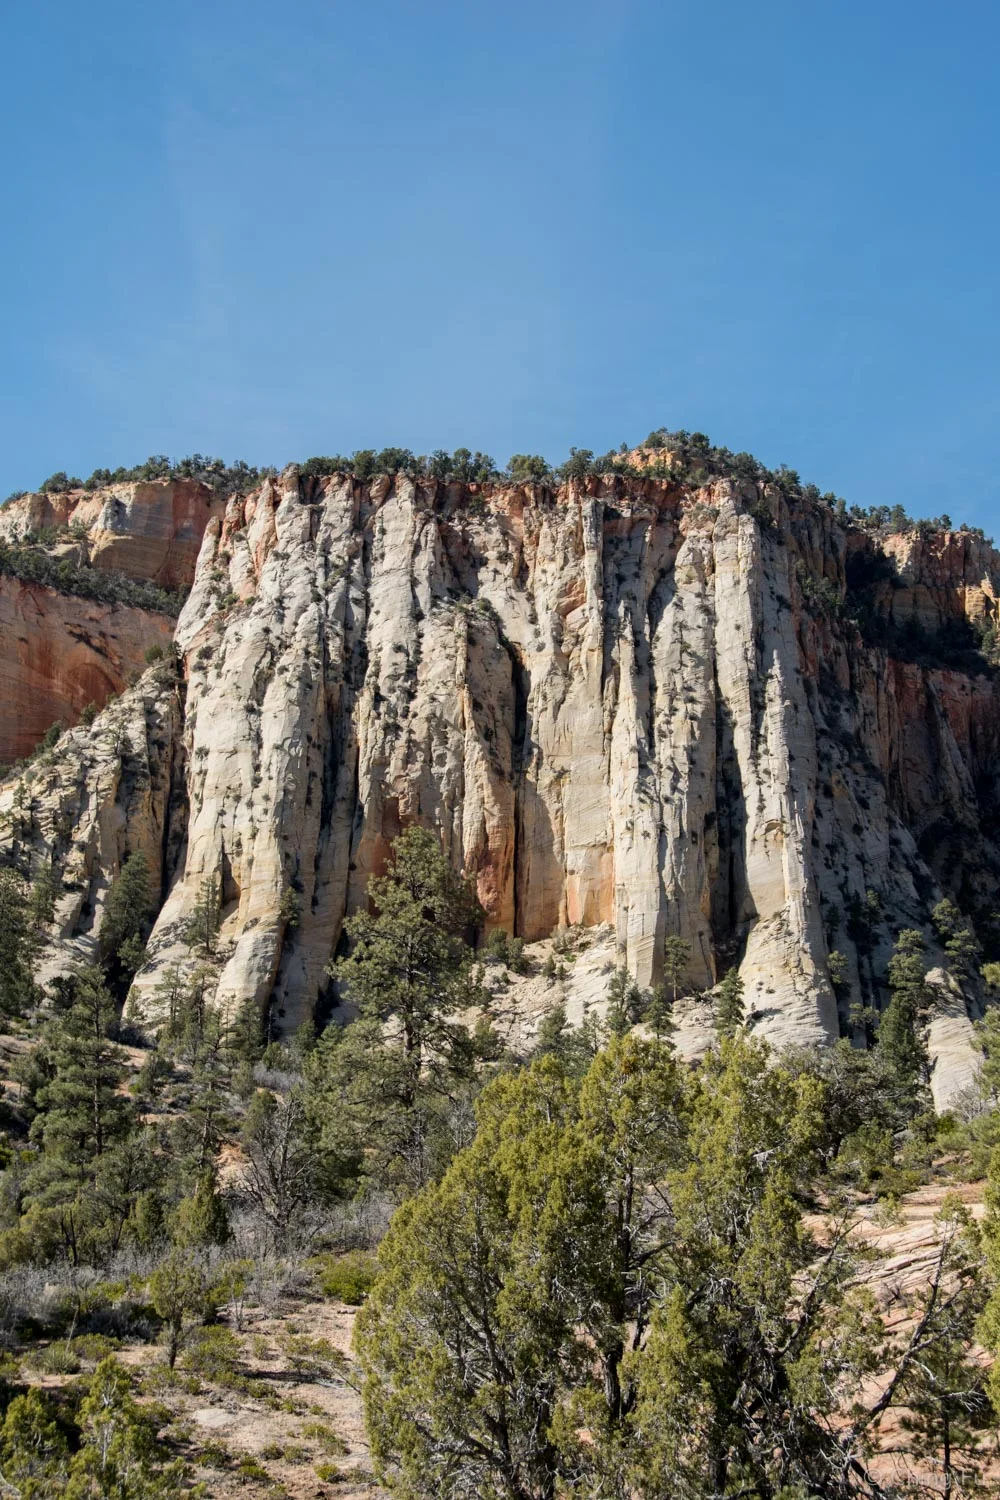
Zion-Mount Carmel Highway
I really wanted to go through the tunnels on Zion-Mount Carmel Highway because I remembered seeing photos years ago that the tunnels have windows in them looking out into the canyon. It turned out the best part of the drive wasn’t those windows but the bighorn sheep that were perched on rocks alongside the road. It’s worth driving out that way because the scenery is beautiful and different from Zion Canyon. We turned around at Checkerboard Mesa.
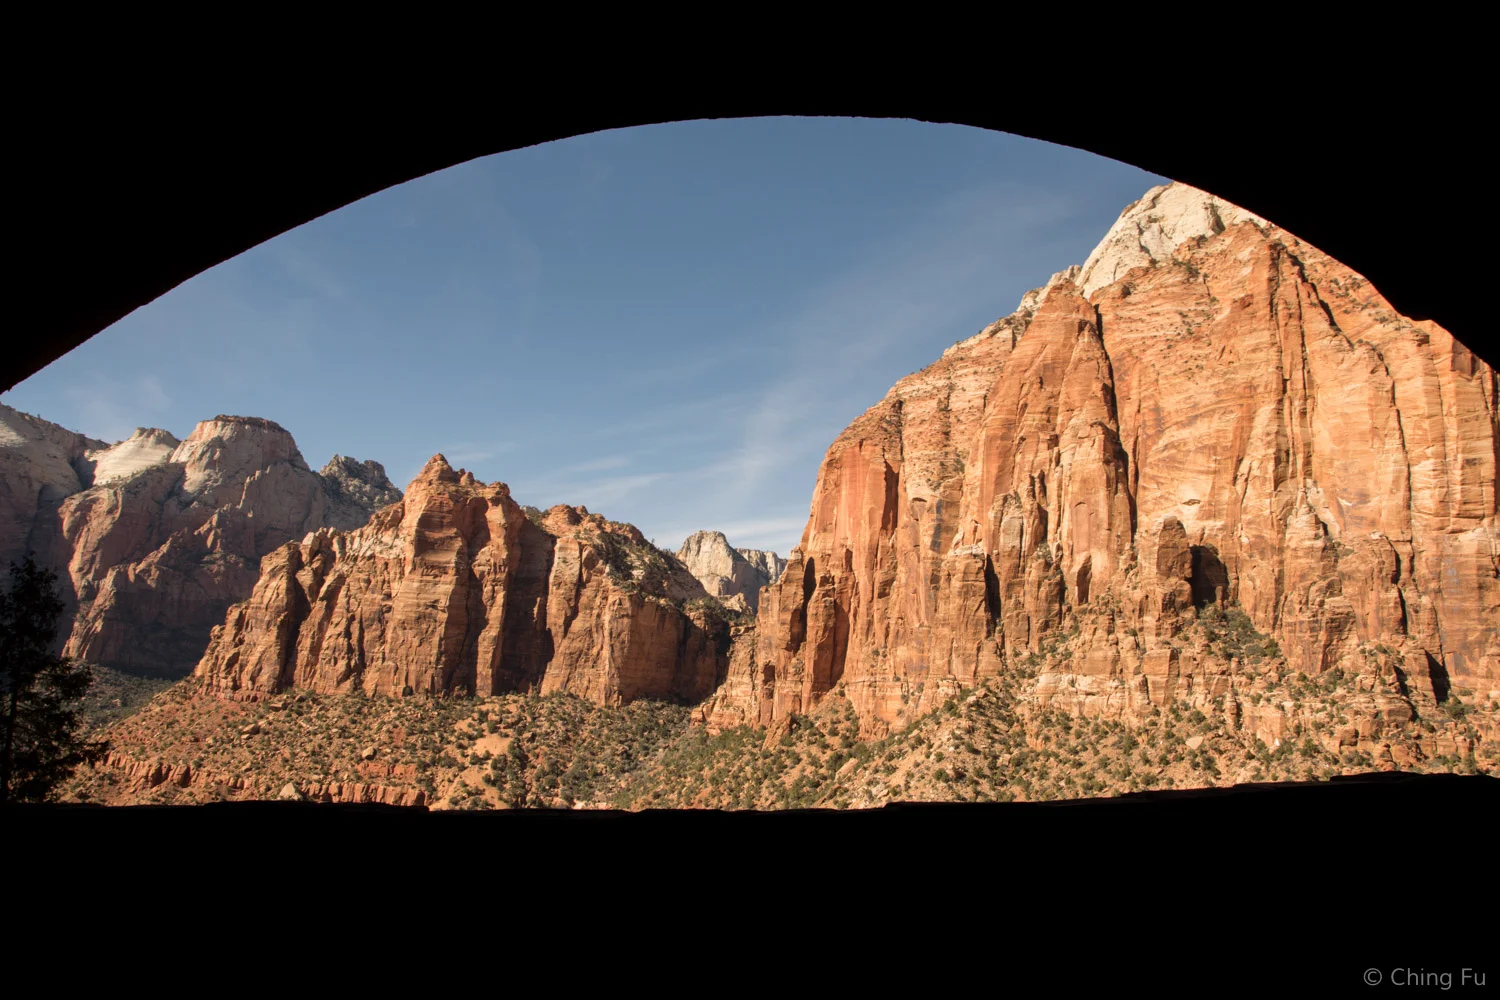
View from inside the tunnel.
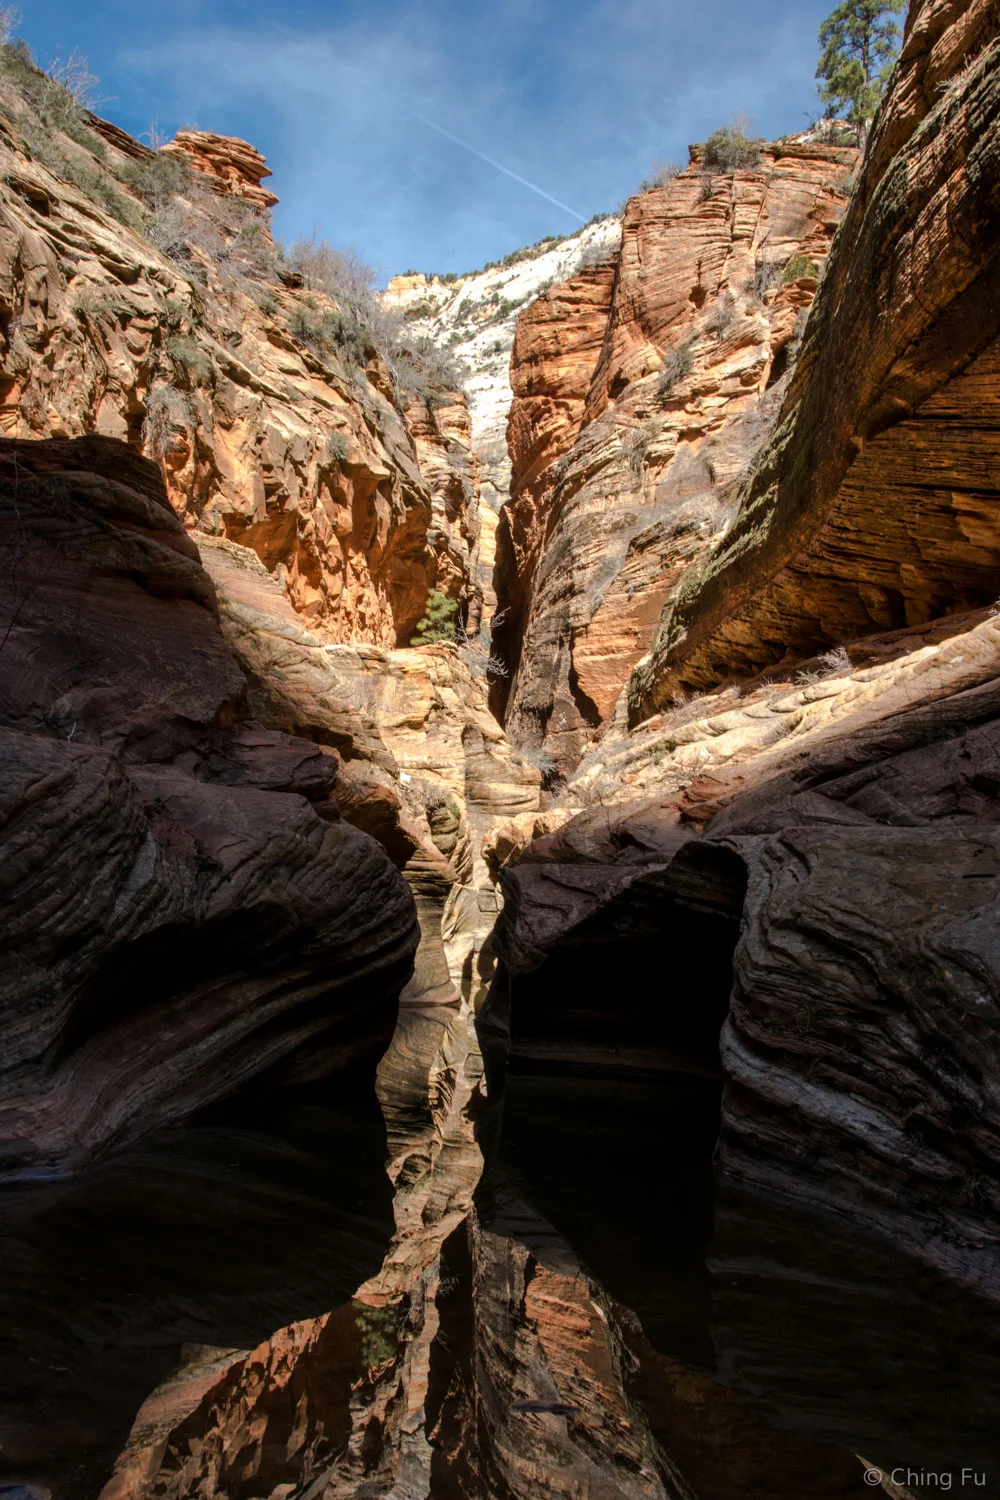
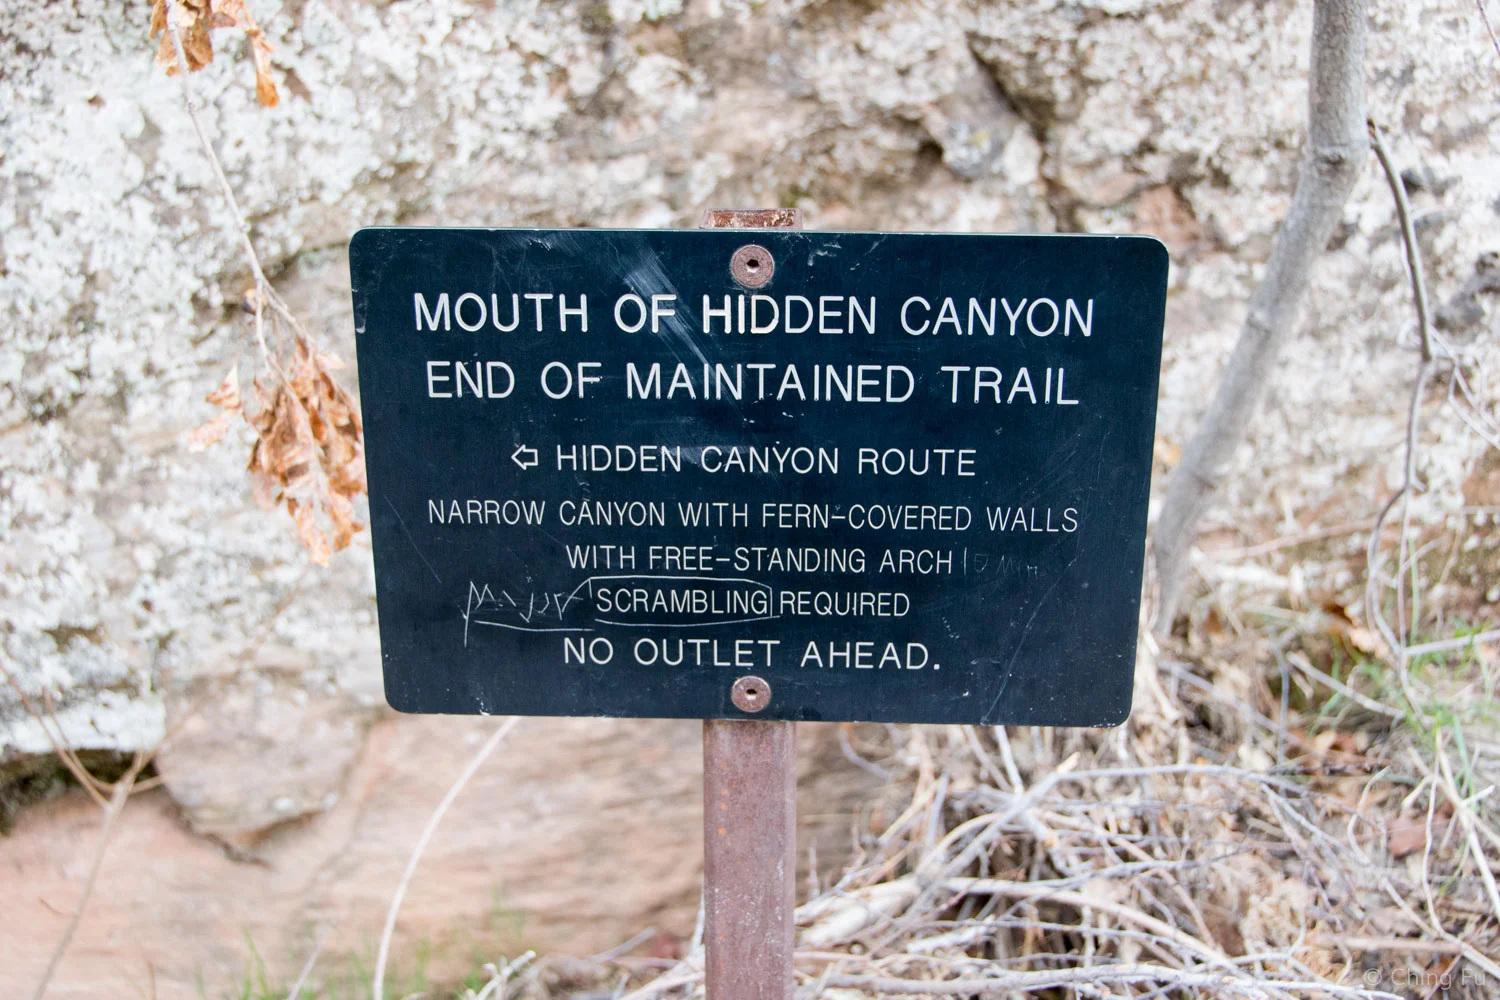
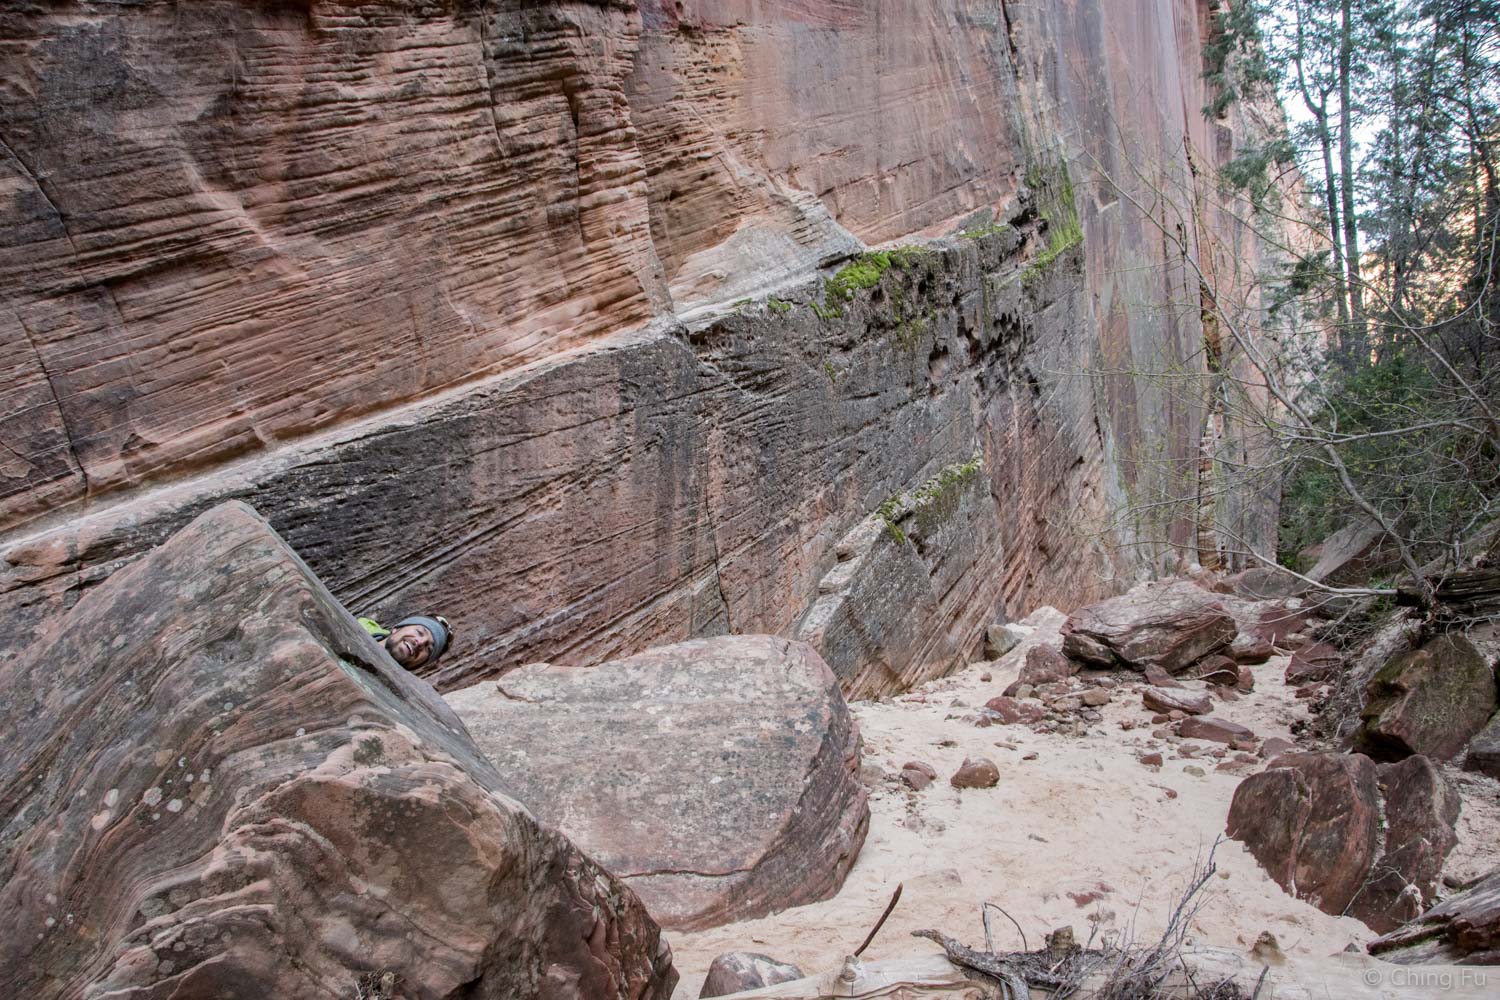
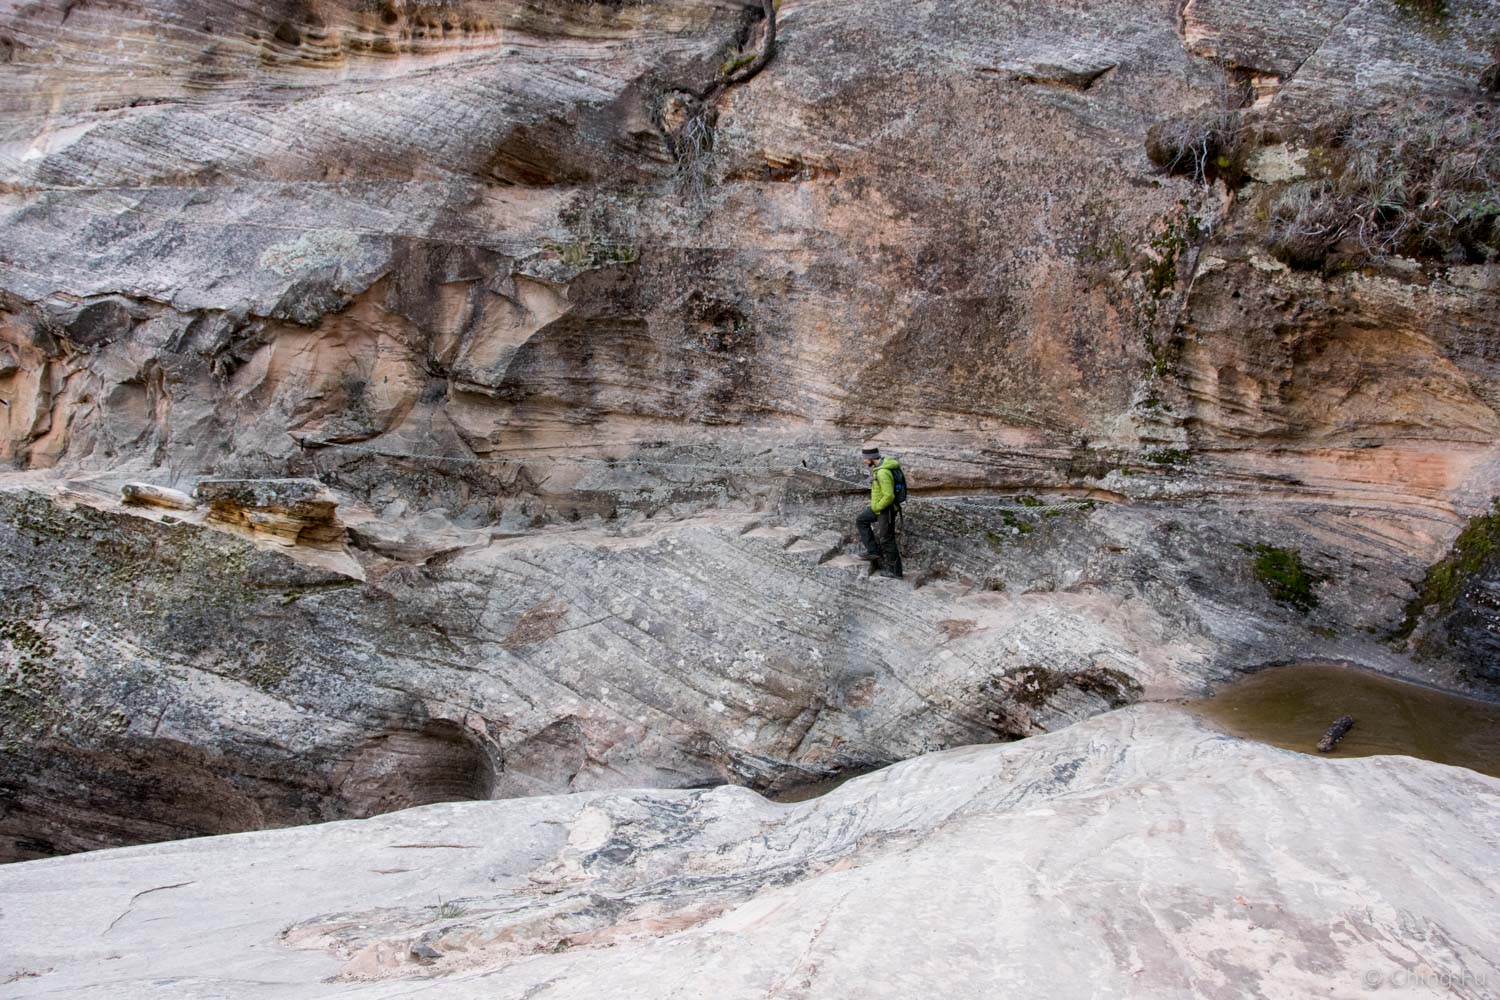
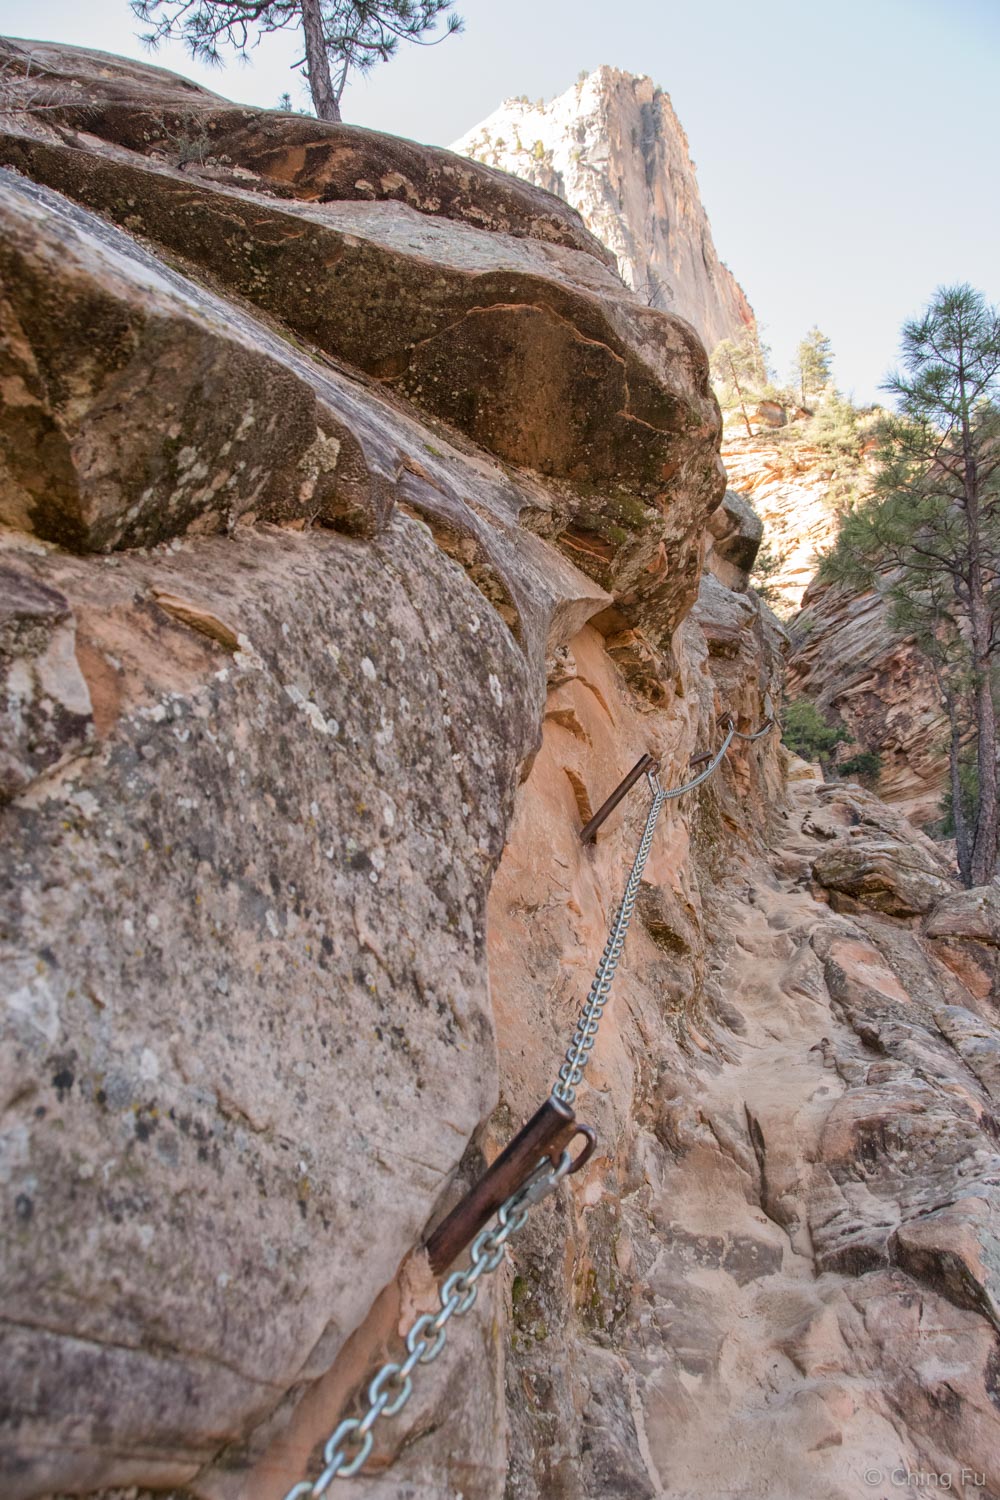
Hidden Canyon
Jerud got to go on this hike with Dolly and Bill while I stayed home and watched the dogs. Then a week later Jerud and I went back to hike this together so I could experience it for myself. We really enjoyed the hike because it had a lot of variety and was very active – you have to use your hands and body a lot to scramble up and over rocks, tree trunks, and around pools of water. The canyon walls are also really cool looking. The beginning of the trail has chains along the cliff face, similar to Angels Landing (but only open on one side). It starts off on the same steep switchback trail as Observation Point before splitting off and going into a narrow canyon. Go as far as you are comfortable and able to. The only reason to keep pushing inwards past the baby arch is because you like scrambling challenges.
Taking the hard way.
Baby arch.
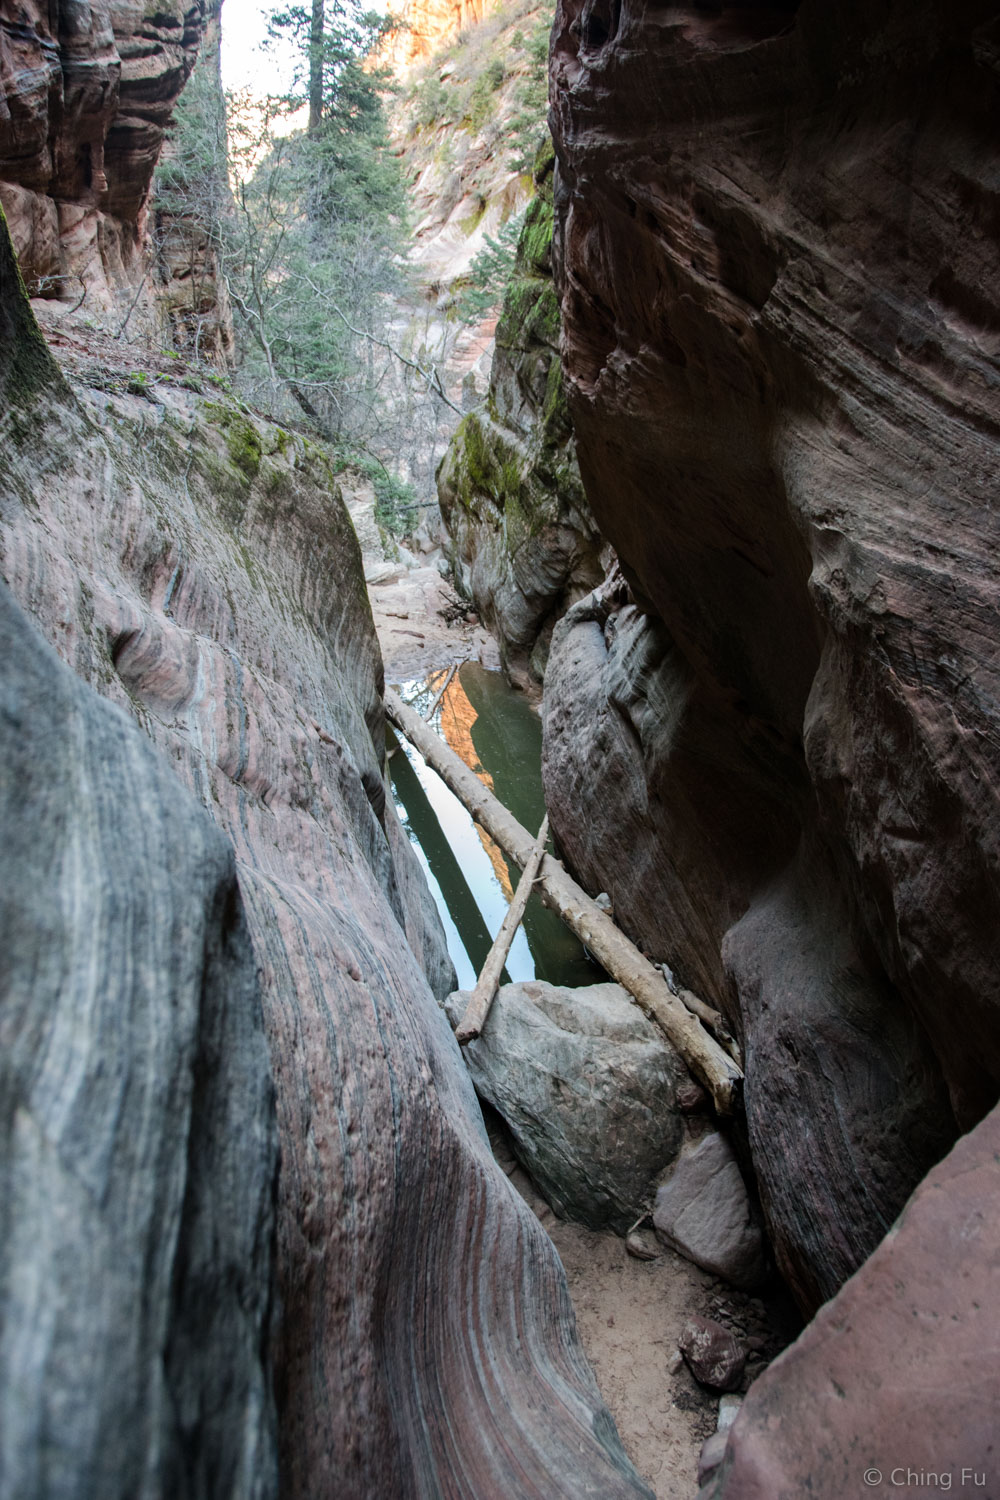
Log crossing.
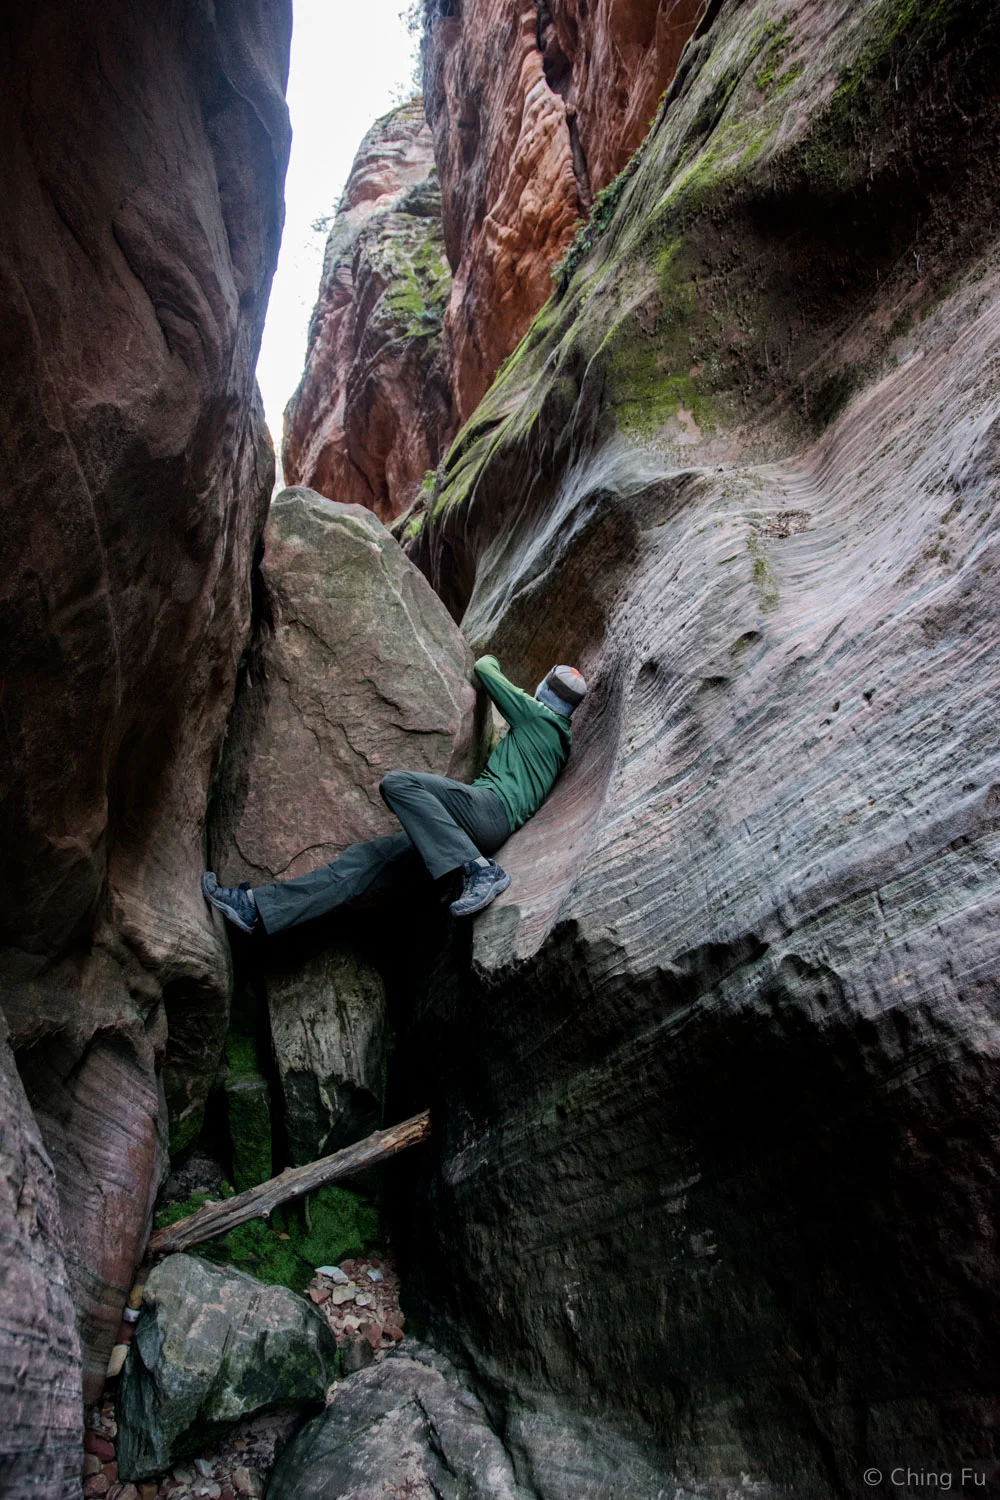
Only way up.
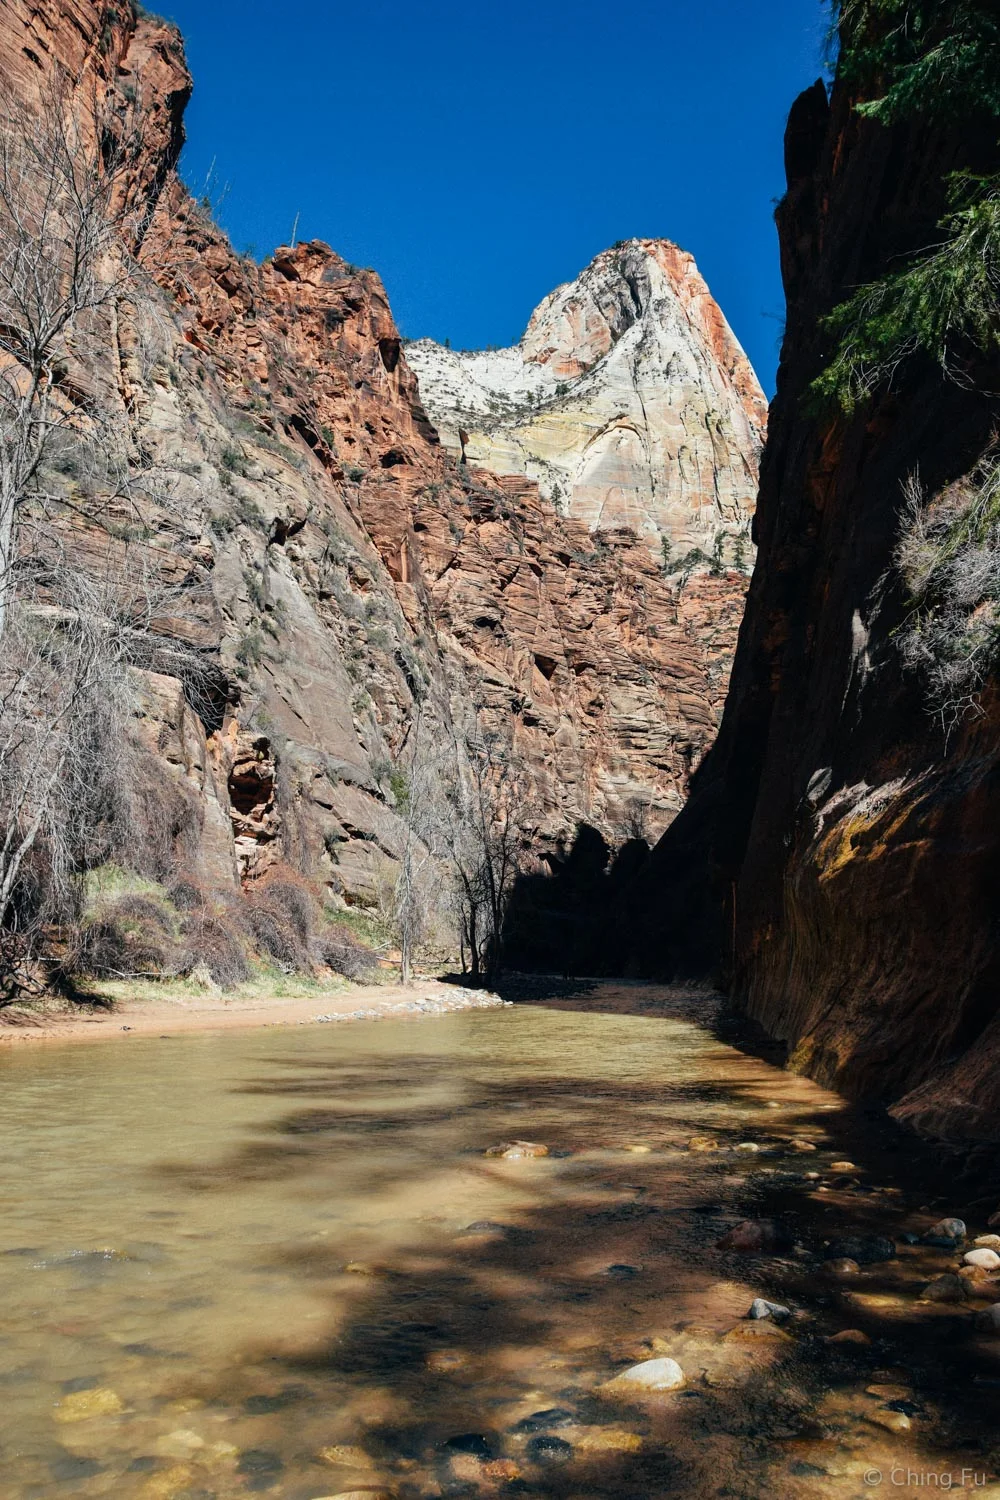
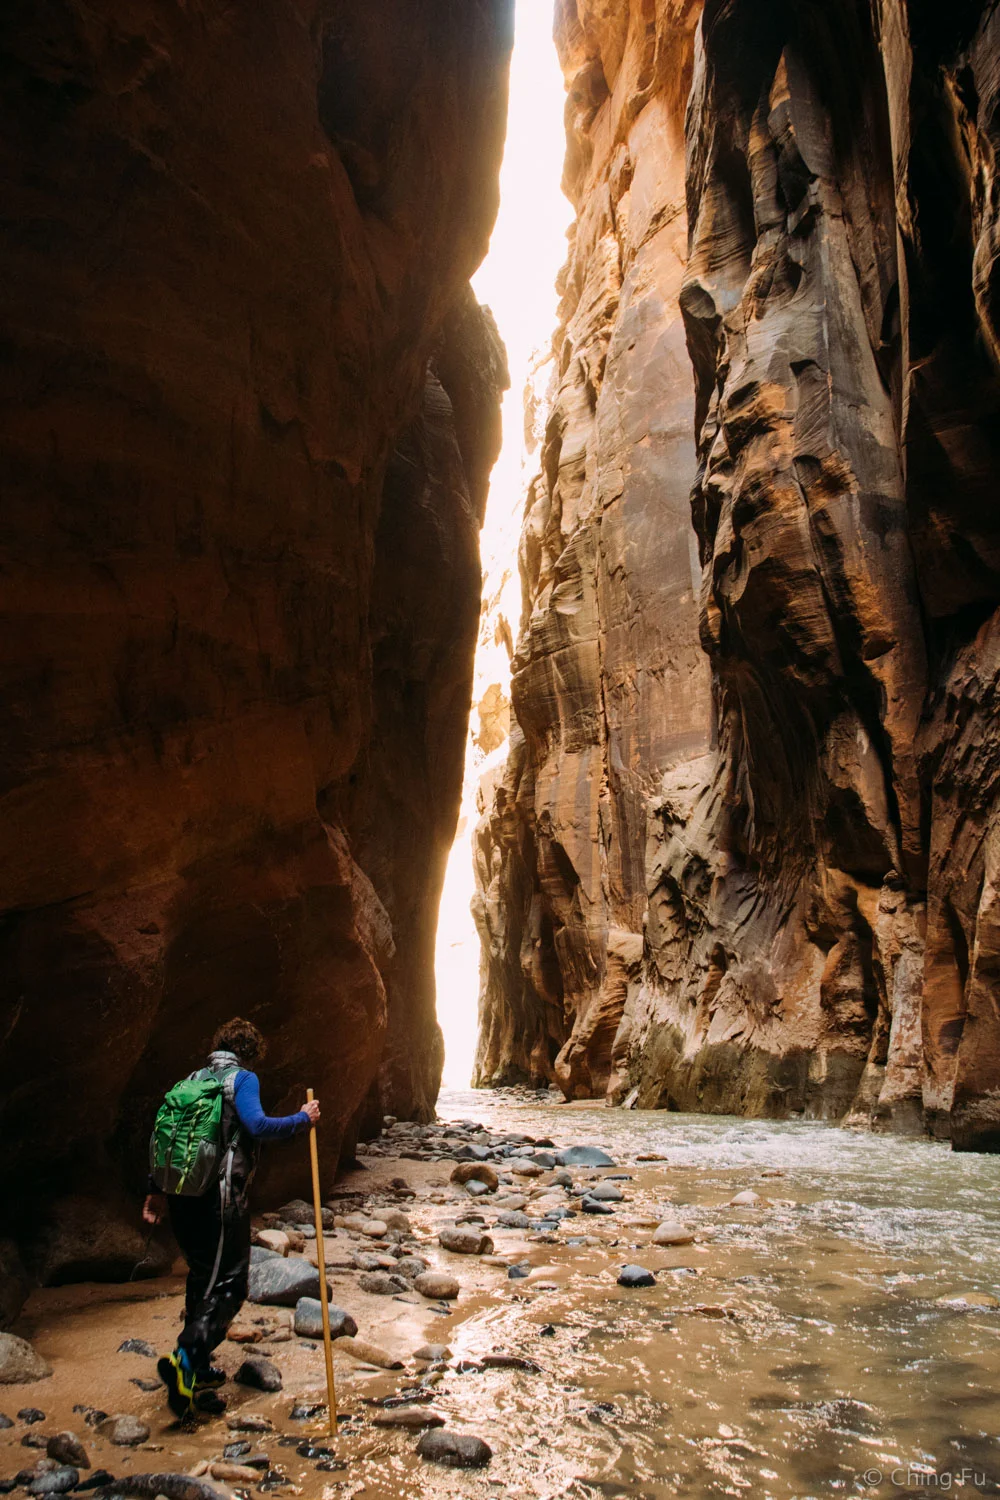
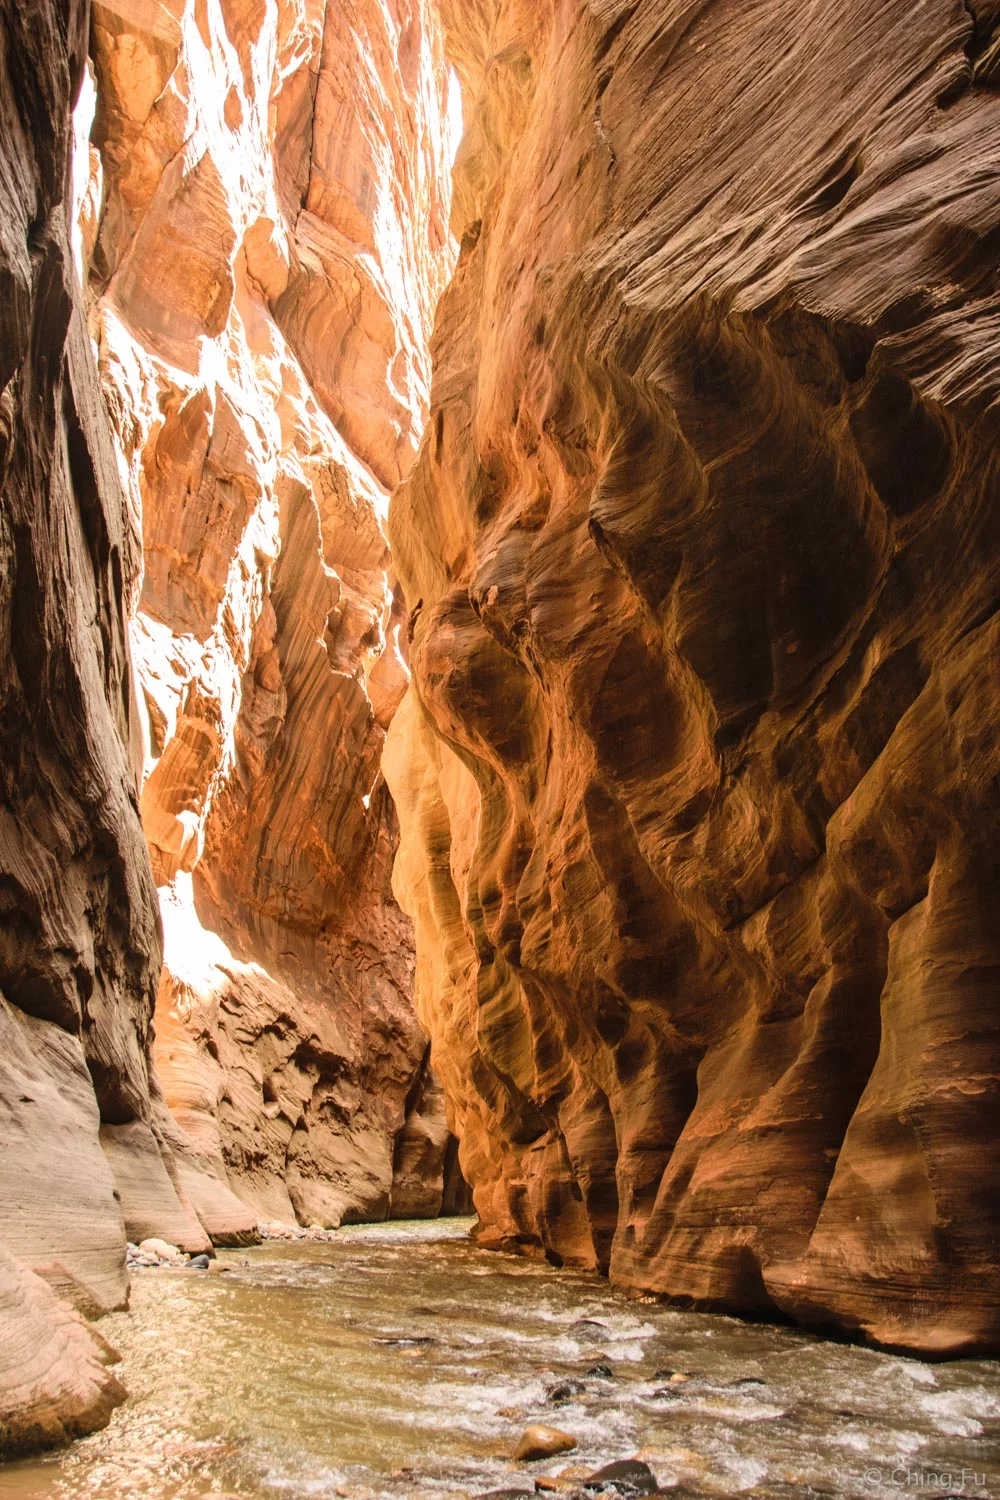
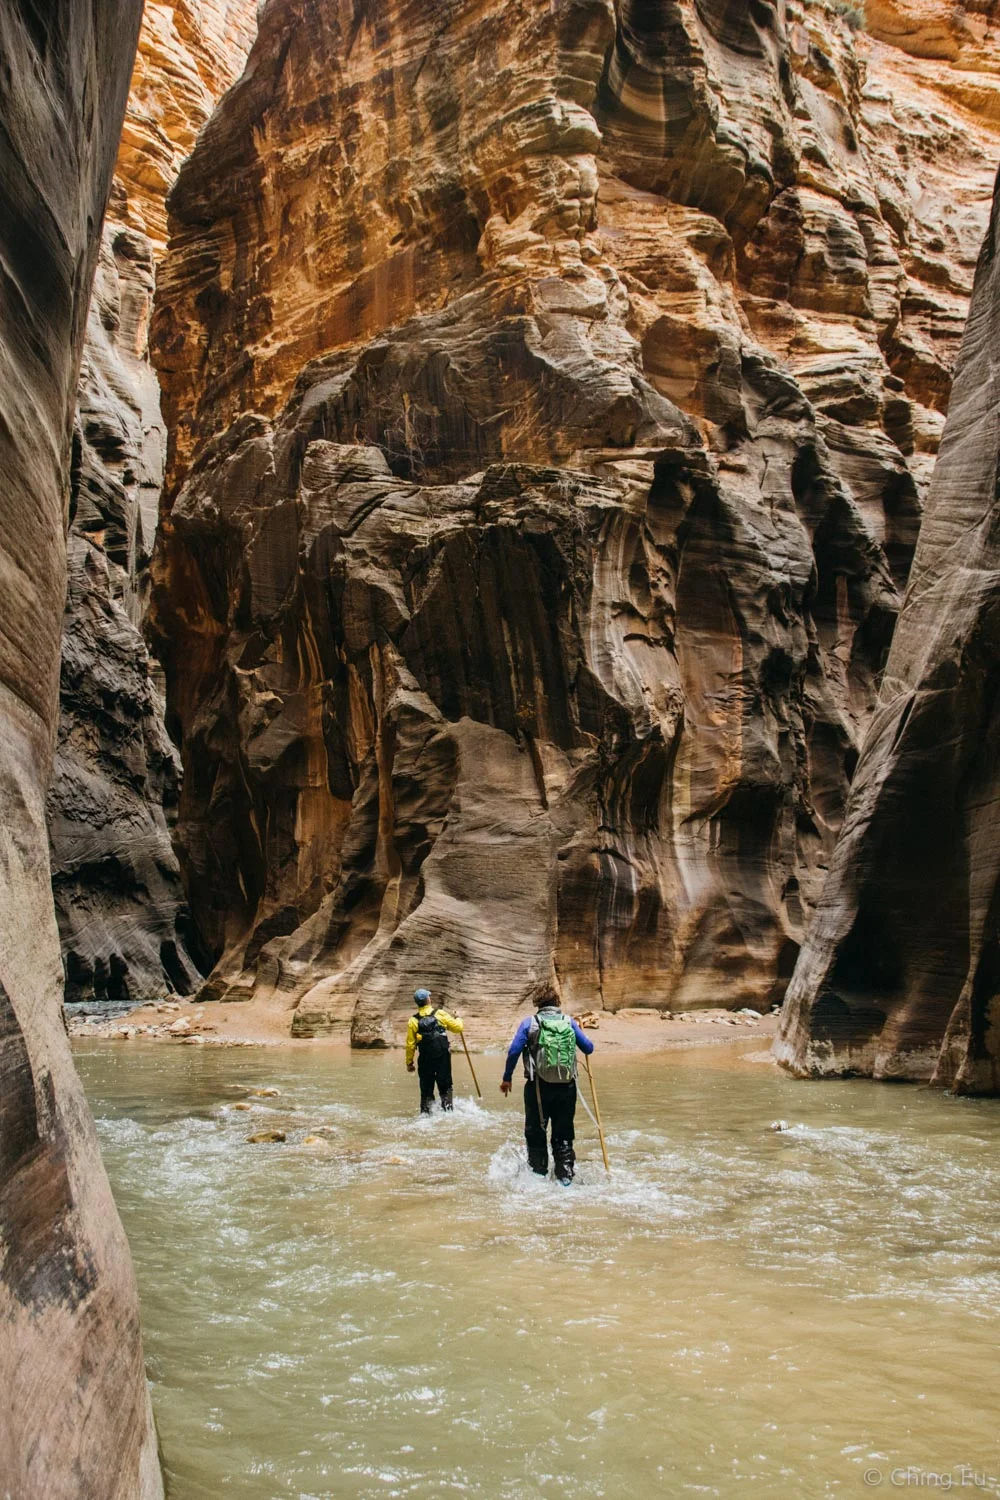
The Narrows
I got to join Dolly and Bill on the Narrows hike while Jerud stayed back to dog-sit. The Narrows was…WOW! It’s one of my top experiences at the park (along with hiking the Subway, which I did on my first trip to Zion). Hiking through the Narrows means being 1,000 – 2,000 ft. below the top of the canyon walls, picking our way through the Virgin River that was knee- to stomach-high a lot of times. The canyon walls converge, leaving a 20 to 30 ft. wide gap to stand in at the narrowest section with a sliver of sky high above. The curves, turns, alcoves and hanging gardens inside the canyon were mesmerizing.

This hike was tiring – it was mentally and physically challenging. We were in the Narrows for almost 7.5 hours total, with a side trip up Orderville Canyon. The majority of the time was spent walking through the river, trying to make sure we didn’t end up chest deep or fall over in sections with strong currents and iffy footings.
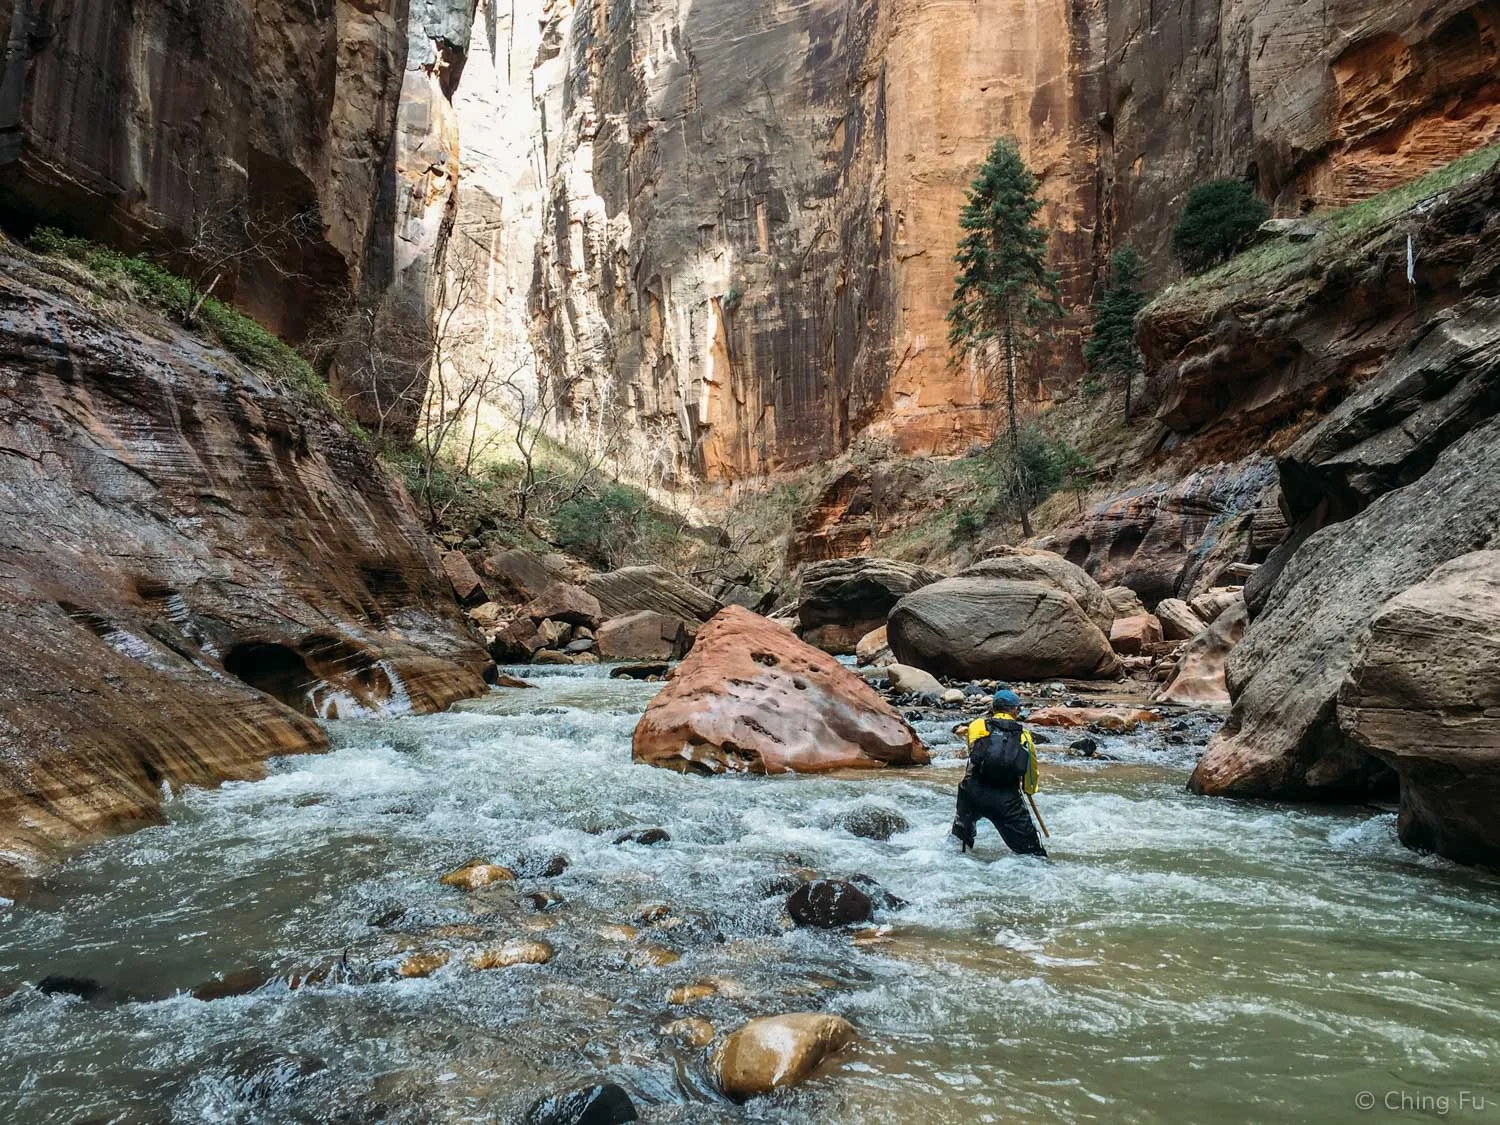
I initially left my DSLR in a dry bag in my backpack, but I couldn’t easily get it out for photos. Then I clipped the dry bag to my waders, but pulling the camera in and out of the dry bag was a pain. So I ended up carrying my camera over my shoulder and sticking the camera inside my waders against my chest. The hip belt of my pack prevented the camera from falling down inside the waders, kept the weight off my shoulder, and acted like a splashguard. But I still had to be extra careful walking through the river so I didn’t accidentally fall in.
Whenever I felt like my luck might run out I'd put my camera in the dry bag, clip it to my pack and stick it inside my waders.
Our goal was to hike to Big Springs, but after 4 hours of going up the river we were tired, especially after a few particularly challenging sections. We weren’t sure what Big Springs looked like, whether or not we had already passed it (turns out it’s a large 10 ft. waterfall that can’t be missed), or how many more “just around the bends” there were.
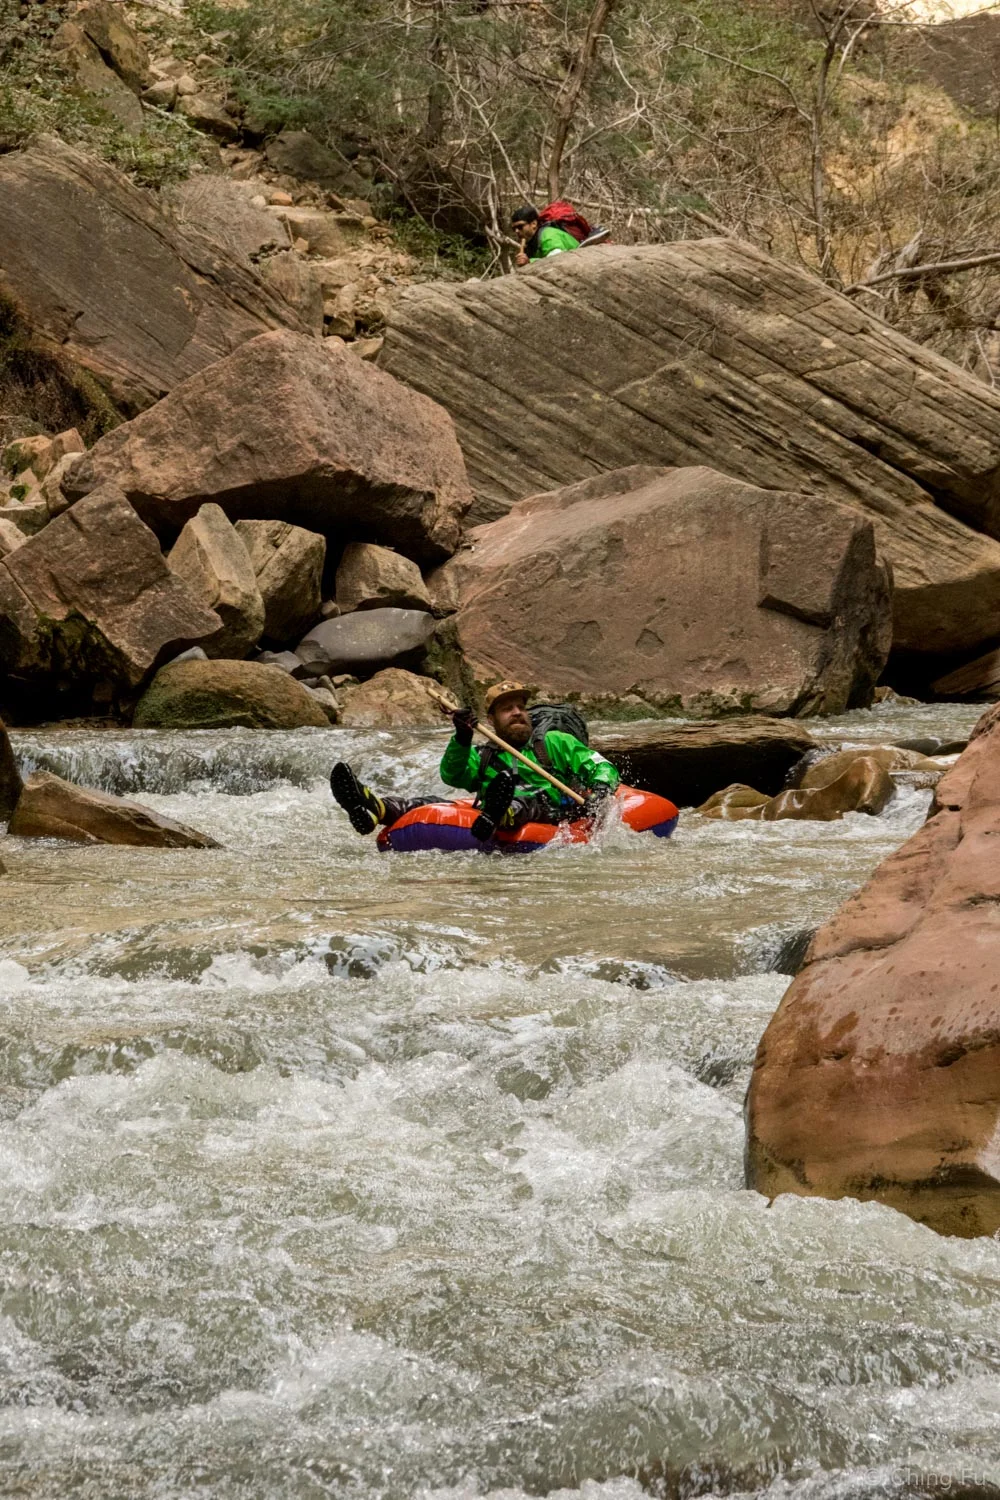
This guy may have had the right idea with a pool floaty. His fellow backpackers were behind on foot.
When we returned our dry suits, we found out from Zion Outfitter that we were about 0.5 mile from Big Springs and to get there we would have had to swim. Not an option with waders on.
I would highly recommend this hike! We plan to come back one day when the weather is warmer and we don’t have to worry about the dogs so Jerud can also experience it.

At the intersection for Orderville Canyon to the right.
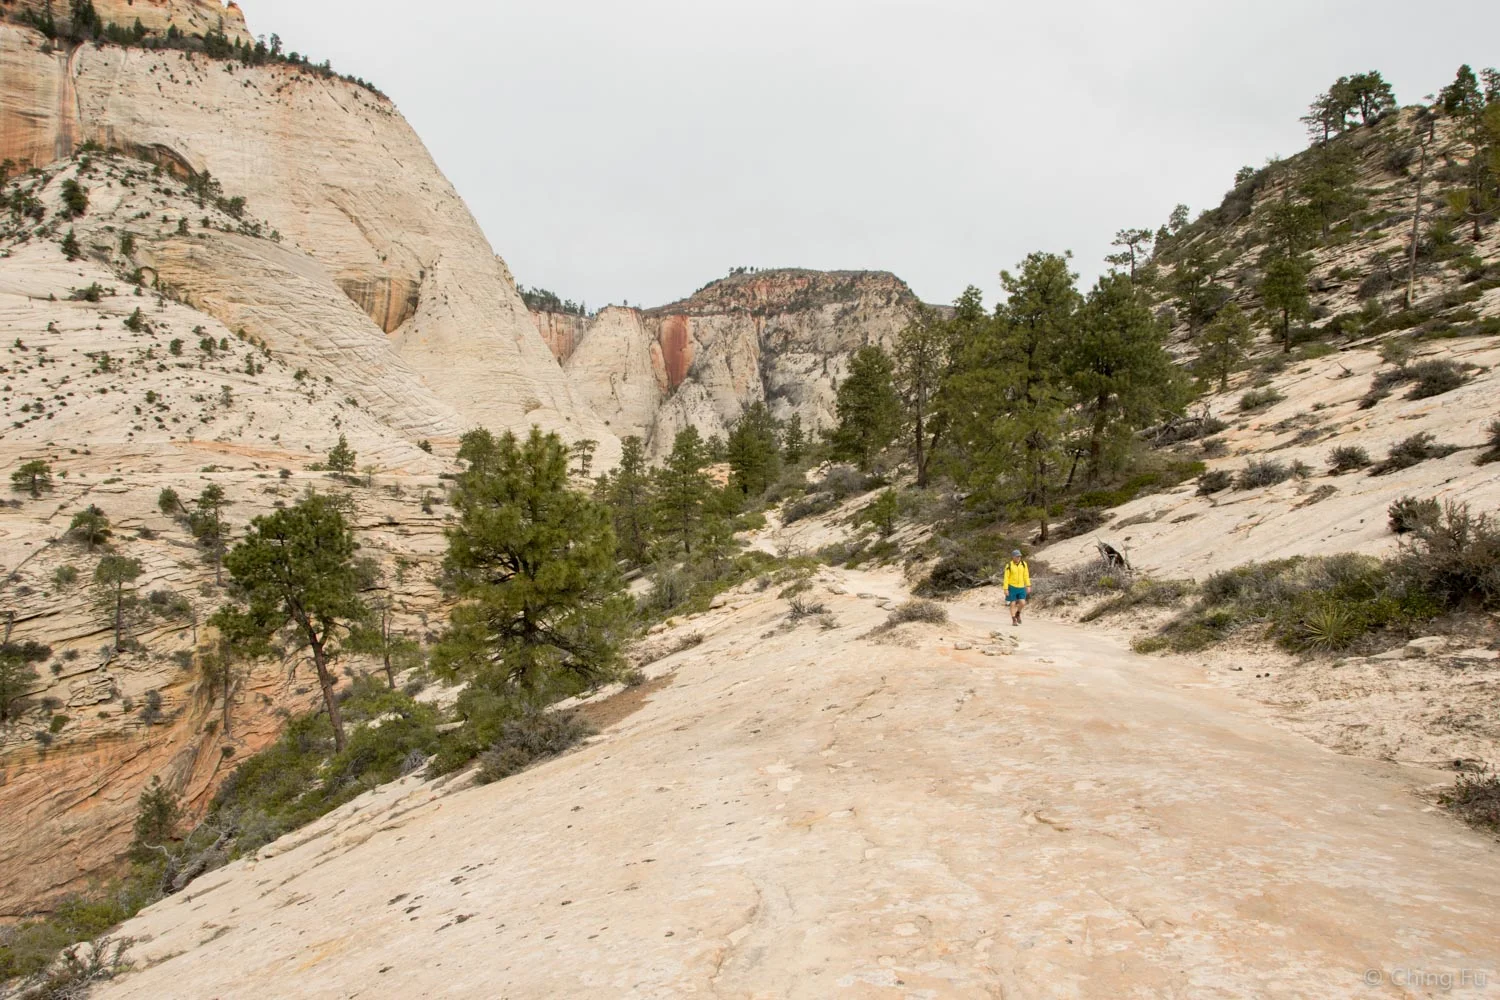
Angels Landing & West Rim Trail
Over breakfast Dolly found out from a stranger that West Rim Trail was worth hiking and a good alternative to summiting Angels Landing. We agree. At the fork, instead of continuing right to reach the top of Angels Landing, we took the West Rim Trail on the left. This trail turns the corner to bring hikers to a view that Angels Landing doesn’t offer. The scenery here changes and although it isn’t the long range view of Zion Canyon, it’s a view worth seeing.

TIPS:
- The website Joe’s Guide to Zion National Park has really good hiking information about the trails throughout the park.
- If you aren’t comfortable hiking to the summit of Angels Landing (due to the scariness) then I would recommend going to the top of Observation Point which has the same view of Zion Canyon.
- If you don’t make it to the summit of Angels Landing, don’t just turn around and head back down - go hike as far as you want on the West Rim Trail before turning around. Or check it out if you still have the energy and time after summiting Angels Landing.
- Whether or not you’re comfortable hiking up Hidden Canyon, specifically the chain section, is a good indicator if you’ll be comfortable with the chain section of Angels Landing – which is more exposed.
- The difficulty of Hidden Canyon changes a little depending on how recently it rains – some pools of water didn’t exist when Jerud went the first time but formed after recent rainstorms.
- We recommend hiking Observation Point and Hidden Canyon on the same day since they are the same trail for the first mile or so.
- If eight miles round trip to the top of Observation Point is too much then hike Hidden Canyon and then go into Echo Canyon on the Observation Point trail. Echo Canyon is worth it (and only about 1 mile extra from the trail intersection)!
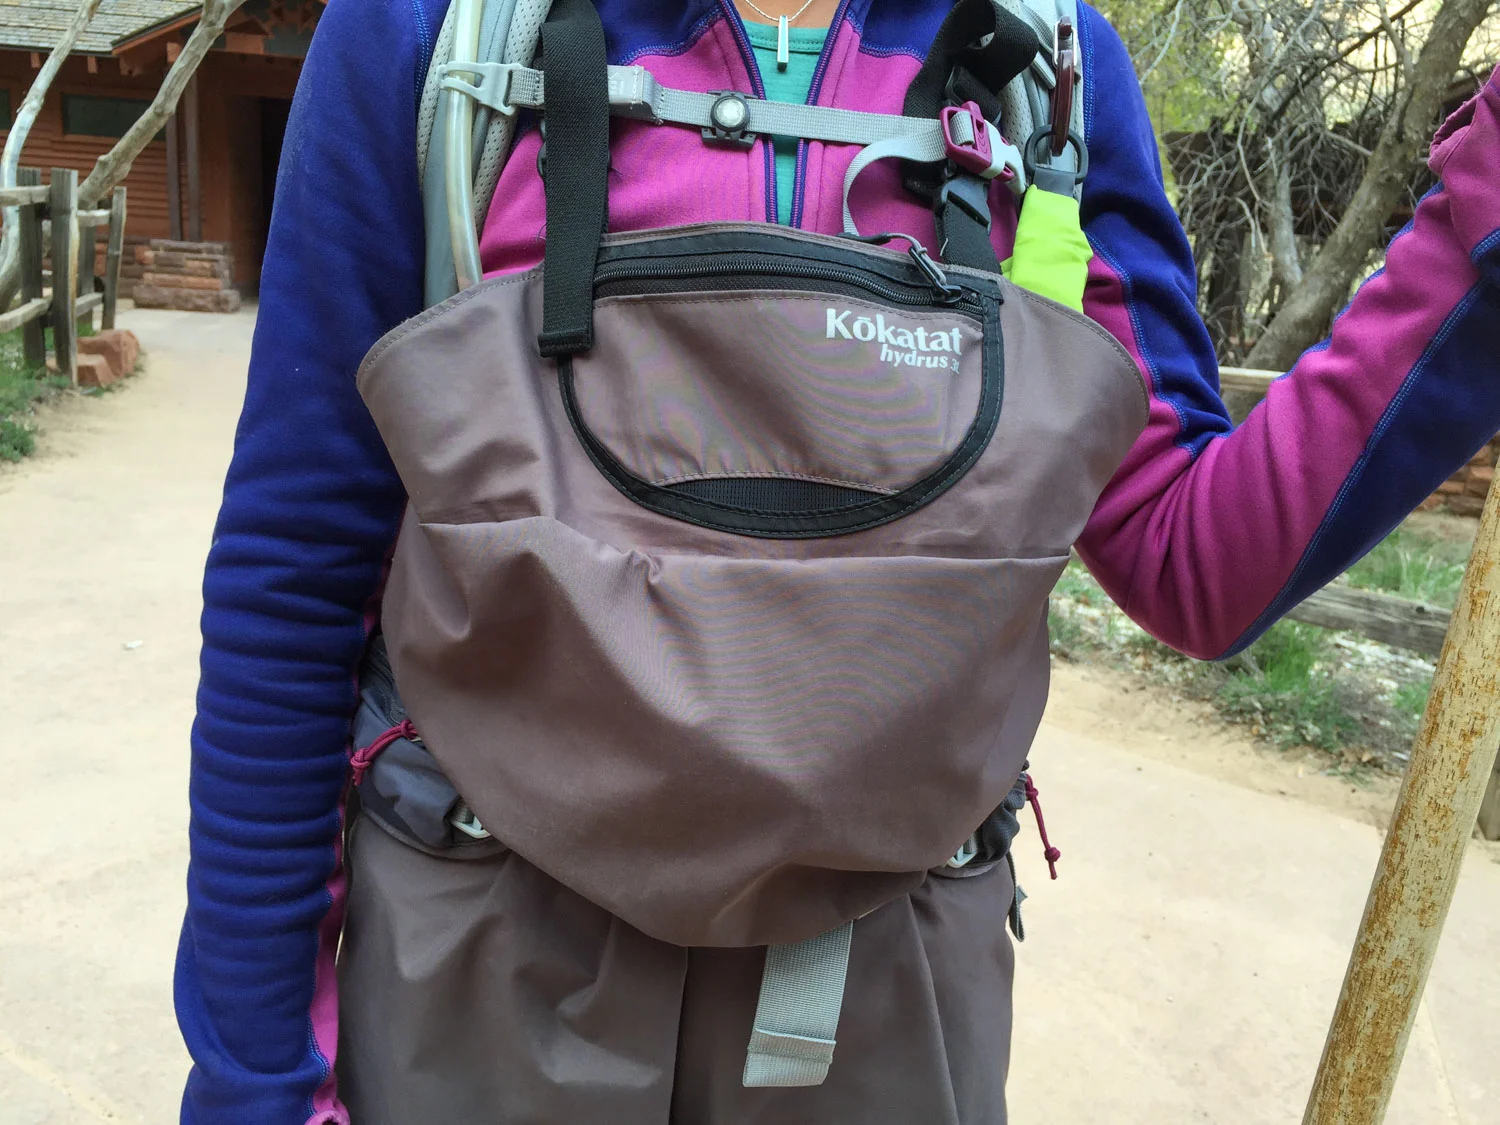
- To hike the Narrows, we got the Narrows wader package at Zion Outfitter for $45 (not including tax). The package includes waders, neoprene socks, water shoes (very comfortable and worked well in and out of the river), and a walking stick.
- For an extra $10 you can get a jacket to go over the waders to be fully waterproof. It may be worth the extra $10 to have a peace of mind that if you did fall in the river you would stay dry.
- I would insist wearing dry suits and neoprene socks to hike the Narrows in colder weather. The water is very cold and you’re in it majority of the time.
- In our opinion – and many concur – the “Wall Street” section is the best! Don’t turn around before that!
- I highly recommended bringing a walking stick (over a hiking pole) to hike the Narrows. It helps balance, stabilize, and scout out river depth and rocks. A stick is included in the Narrows package from Zion Outfitters.
- Zion Outfitters opened at 7:30 AM and we were there at 7 AM waiting (on Easter Sunday). A short line formed at 7:15 AM.
- Leave as early as possible to miss the crowds that appear in the Narrows later in the day. Really, just always get on the earliest bus possible to miss the crowds in Zion.
- For the Narrows - place water-sensitive belongings in a dry bag (which can also be rented).
- Pee before you start your Narrows hike because there’s not a bathroom besides at the parking lot. More importantly, poop before you head onto the trail!